dehydrating

Soul Food - A Trail Recipe

While some hikers love easy, no cook dinner options I happen to be one of those hikers who just loves a hot meal, no matter how hot it is outside! To me, a hot meal can really end my day on a good note.  Was it hot and nasty today? A good meal makes me feel better.  Cold and drizzly?  A hot meal warms me up and sends me to bed happy.  Now, imagine you’re having a tough day out on the trail and you open your food bag to see that you left yourself your absolute favorite dinner for tonight.  This moment can not only change your day, it can sometimes change your entire outlook!  One of those trip altering meals I had on the Benton MacKaye Trail was this one - Soul Food.  I adapted it from the book Lipsmackin’ Vegetarian Backpackin’ and it was definitely one we think about even off trail!  If you wanted to take this meal to the next level and you aren't vegetarian, you could even add in chunks of summer sausage!

Soul Food - 1 serving

1/2 heaping cup brown rice, dehydrated and cooked in veggie stock
1/3 cup of precooked and dried black-eyed peas
2 tbsp onion soup mix (here’s the recipe I use, but you can use store bought Lipton brand)
1 tsp onion flake (in addition to your soup mix!)
1/8 tsp black pepper
1/2 tsp parsley flake
1/2 tsp cajun/creole seasoning
1/8 tsp cayenne pepper
2 tbsp bacon bits/TVP
1 pack Cholula hot sauce
Optional: Slices of summer sausage

At home: Add all ingredients to a zip top bag and seal.  Shake to combine evenly.  Add one pack of Cholula hot sauce to the bag before packing.  

On trail: Pour contents of the bag into your cook pot, minus the hot sauce, and cover with water, leaving approximately 1/2 to 1 inch of water extending over your ingredients.  Bring to a boil, stirring occasionally.  Take off the heat, add sausage if you'd like, and let meal sit for 5-10 minutes.  Check the texture of the beans for doneness before adding hot sauce and digging in. 

Dal with Rice - A Trail Recipe

Indian cuisine is so delicious - all those earthy flavors with a hint of spiciness.  When I’m out hiking a long trail any time I see a town that has an Indian restaraunt I’m spending my days and nights dreaming of that food!  When I was hiking the AT in 2012 one of my favorite “Treat Yo’ Self” meals came in the form of the ready-to-eat India Kitchens meals.  Granted, they’re heavy and you have to eat them basically your first night out of town, it always made me smile to see hikers turn their heads to see where that delicious smell was coming from.  You’d be the most popular hiker in camp when you had Indian-style meals!  Since India Kitchens is heavy and a bit cost prohibitive, I set out to make my own Dal for backpacking.  Below is my favorite dal recipe, dehydrated and packed up for a backpacking trip!

Dal with Rice - 1 serving

1/3 cup dehydrated jasmine rice (I cook mine in veggie stock before drying)
1/3 cup dehydrated dal (see below)
1/4 cup mixed dehydrated mushrooms, eggplant, and bell pepper
2 tbsp chopped cashews
2 tbsp currents (or raisins)

At home: Add all ingredients to a zip top bag and mix well.  

On trail: Add contents of the bag to your cook pot and cover with water.  Bring meal to a boil, stirring occasionally to avoid sticking.  Once the meal boils, remove from heat and set aside for 10 minutes, stirring occasionally to meld the flavors.  

My favorite dal recipe:

2 Tbsp of butter or ghee
1 small onion, diced
4 cloves of garlic, minced
1 tsp whole cumin seeds (crushed to release flavor)
1 Tbsp of Garam Masala
1 tsp turmeric
2 tsp salt (maybe more)
2 tsp curry powder
2 serrano chiles, chopped small (seeds removed if you wish)
2 cups of red lentils
3 cups (approximately) of chicken or veggie broth
1 can of diced tomatoes

Sautee the onion in the butter/ghee until slightly caramelized. Then, add in your garlic, chiles, and spices.  Cook until very fragrant, only about 1-2 minutes.  Add your lentils and your stock, covering the contents of your pot about half an inch or so.  Cook until your lentils are halfway cooked, soft outside but still firm in the middle.  Add in your tomatoes and cook down until lentils are soft.  Taste for saltiness and add salt to your liking.  Let your mixture cool to room temperature before adding to food processor or blender to puree.  

To dehydrate your dal, spread the mixture in a thin, even layer on a fruit leather sheet or parchment paper.  Dry in your dehydrator on 135 degrees until it begins to crack and dry, resembling chalk.   

Dehydrator 101

After my big thru hiking announcement last week I've decided to share some of my favorite backpacking recipes with you guys; however, it occurred to me that while I'm whipping up a lot of these recipes like it's no big deal you might not feel that way too!  In fact, it took me a while to perfect my methods for dehydrating tasty meals.  Once you finally start to master techniques to make your food taste better, dehydrating your own backpacking meals is an easy "set it and forget it" option that not only can provide you better nutrition, but can also save you money on resupplies in tough areas.  Here's my quick and dirty guide to dehydrators - both purchasing and techniques to help you make your best backpacking meals.  

The Purchase

Buying a dehydrator is going to be an investment.  In fact, I'd look at it the way you look at purchasing a major kitchen appliance.  After doing plenty of research about what I'd like to use to make an entire season's worth of hiking meals I chose a 5-Tray Excalibur system with a thermostat.  The thing about dehydrating backpacking meals is that you aren't throwing them all in at one time.  First, you're dehydrating the mixed vegetables for a few days. Then maybe you're doing rice for a few days.  Then, you might be doing a few batches of sweet-flavored rice. You do everything in parts before assembling the meals.  Having a fan and a thermostat will help ensure you're dehydrating fruits and veggies at optimal temperatures to keep nasty bacteria at bay.  Meat, fruit, veggies - they all have optimal temps for pulling out moisture.  The thermostat will definitely make sure you're drying your food at the safest temperatures.  

While there are cheaper countertop models of dehydrators available, I definitely recommend going with a model with a fan for air circulation.  The round tray systems need constant babysitting to move the trays.  If you don't do this in a fan-less model, you'll have leather-like layers closer to the heat source whereas your top layers might not even be halfway dry.  You can definitely do months' worth of food on one of these budget models, but be sure you have the time to dedicate to rearranging the trays.  

Finally, you'll need a set of fruit leather trays for your dehydrator.  You can again go the budget option and use parchment paper.  I went with the generic fruit leather reusable inserts on Amazon.  I've reused them countless times for the past three years and they don't hold flavors and just need a quick rinse.  I highly recommend them.  Aren't planning on making fruit roll-ups?  That's fine - neither did I!  But, you'll need these guys to dry sauces, veggie paste, even condiments you'll want to dry to make them more potent.  Trust me, you WANT these tray inserts!

Techniques

So you've purchased your dehydrator and you've found a couple of recipes you want to try out.  Maybe you want to try and recreate one of your favorite pasta sides at a fraction of the price you'd pay for them over the period of a distance hike.  Either way, it's time to start dehydrating.

Rice

Let's say your recipe calls for you to use your own dehydrated rice for a savory recipe.  Instead of just making plain rice like you'd make at home, I highly recommend seasoning the rice before you get it into your dehydrator.  If you're making a savory dish, I recommend cooking your rice in chicken, beef, or vegetable stock and salting it slightly heavier than you would eat at home for a normal meal.  On trail, you'll wish it had more salt!  After the rice cooks, cool it to room temperature before dehydrating.  Making a sweet rice - maybe for a pudding or breakfast treat?  Try cooking it with vanilla almond milk instead of water!  When it comes time to dehydrate your rice, spread it out thinly and try to avoid clumps of rice.  Clumps will hold more moisture and take longer to dehydrate.  If you're home while it's dehydrating, go out and break up the chunks of rice every so often to help it dry out faster.  

Vegetables

Not all frozen veggie mixes are created equally!  My favorite store, Aldi, has mixed veggies in a bag as cheap as $0.95!  However, their mixed veggies aren't all the same size and, in fact, the carrots are in rounds that are easily four times the size as the other vegetables.  This doesn't make for fast dehydrating OR rehydrating!  On the flip side of this, Wegmans makes a great mixed veggie blend with the exception of the lima beans.  Lima beans are another rehydration nightmare.  I don't care how long you soak or boil lima beans - they never seem to fully rehydrate properly.  When you're looking for mixed vegetables to dehydrate for additions to your meals, I highly recommend looking at the contents and shapes of the veggies in the bag.  BJ's Wholesale has great 4-lb bags that require minimal changes.  The only thing I did to these was cutting the green beans in half to make everything the same size.  When it comes to vegetables, uniform size is key to getting them dehydrated and rehydrated at the same times.  Trust me, there are few things sadder than being hungry on trail and crunching into half-rehydrated corn when the rest of your meal is ready!

Something I did for our meals a few years ago was broiling and blackening bell peppers before dehydrating.  This little something extra really made the flavors taste even more homemade despite being in the backcountry.  My most important tip is to NOT mix different veggies in your dehydrator at the same time if you can help it - especially strong-smelling veggies.  If you want to do a tray of red onions, put them in by themselves or else all your food will taste like onion!

I actually have EIGHT POUNDS of veggies in that second photo. They don't amount to much!

I actually have EIGHT POUNDS of veggies in that second photo. They don't amount to much!

Meat

Meat is a tricky, tricky thing to home dehydrate.  If you're doing beef or ground turkey you'll quickly become familiar with the term "gravel".  The reason?  Ground meat basically has the texture of gravel when you do it right.  Buying meat is the critical first step and you've got to do it right.  If you're set on using ground beef, you'll need to buy the leanest possible cut you can find (less than 90%, and 95% lean is more ideal).  Since buying meat this lean is often expensive, I chose to go with lean turkey as my meat choice.  We bought 99% lean white ground turkey.  Now, cooking the meat is also tricky because you'll have to do it low, slow, and as dry as possible.  No oils at all can be added to the pan, as every bit of oil can go rancid in packaging.  Adding dried breadcrumbs to your meat to soak up the oil is a great step you can take during the browning process.  After cooking the meat to well done, you'll need to sop up any oil that happened to cook out before breaking it up to place in your dehydrator.  Like rice, meat has a tendency to clump, so you'll need to break up the clusters every once in a while. Once your meat is completely dehydrated, I highly recommend vacuum sealing each portion to keep it fresh, just in case.  

Fruit

Like veggies, uniformity is key with fruit.  Having all your pieces roughly the same size will save you time on both ends of the dehydrating and rehydrating process.  One tricky element to dehydrating fruit, however, is browning.  Apples and bananas both tend to brown when they're exposed to oxygen for a period of time.  I solved this problem by brushing easily browning fruits with lemon juice on both sides before putting them on trays in my dehydrator.  I liked seasoning my fruit as well.  A sprinkle of ginger and cinnamon on apple slices comes out delicious!

Me with my bounty - an entire summer's worth of meals for two hungry hikers. 

Me with my bounty - an entire summer's worth of meals for two hungry hikers. 

Just like with any good recipe, mastering skills with a dehydrator will take time and a few errors will happen as well.  It's all part of the journey!  Have you experimented with dehydrating meals?  What is your favorite backcountry meal? 

My Five Favorite Trail Lunches

Recently I started growing tired of my usual PB&J on flatbread or a ProBar for a trail lunch and began looking for something more creative.  When I was online looking for ideas something simple came to me and I couldn't believe I hadn't thought about it before - dehydrating something simple and savory for lunch!  While so much of the food backpackers can find in the stores for lunch is sweet, like a trail mix, granola bar, or Poptarts, I realized that if I did my own dehydrator meals for lunches I could get some more savory foods into my backpacking diet.  Here is a rundown of some of my favorite food to eat for lunch. 

1) Hummus and crackers with veggies - Dehydrating hummus was such a simple idea I couldn't believe why I hadn't thought of it before.  Simply spread your hummus on a fruit leather tray (or piece of parchment paper in an oven or on a regular dehydrator tray) and dry overnight.  On my Excalibur dehydrator I went to the 125-degree setting for 12 hours.  In the morning the hummus should be very powdery and easily crumble.  One container of hummus (10 ounces) should make four servings for those of us who backpack on shorter easier trips.  If you're doing mega miles one container should get you two servings.  Rehydrating is simple and quick - use cold water to cover the hummus powder by 1 inch and squish the bag around for 5-10 minutes.  I usually eat mine with Good Thins crackers and whatever fresh veggies I want to pack out.  I've packed out carrots, celery, and radishes with good results even in the summer.  

2) Dehydrator burritos - Mixing a can of refried beans with a can of enchilada sauce in a large bowl and then spreading thin on dehydrator fruit leather sheets (or parchment paper for those without the sheets) can create a delicious burrito filling for the trail.  Simple dehydrate overnight at 125 degrees and in the morning you'll have a crumbly, powdery bean burrito filling! Rehydrate in a freezer bag for 10-30 minutes with cold or hot water.  Spoon into your tortilla and put salsa on top and you'll have a filling lunch!

3) Pepperoni and Laughing Cow Cheese sandwich - Carrying pepperoni and Laughing Cow cheese are usually a staple on a long trip.  Laughing Cow comes in several flavor varieties and you can use a bagel thin or a sandwich thin for the bread.  Switching up the flavors of cheese and bread every so often turns this trail staple into something different!  Laughing Cow cheese is generally like shelf-stable cream cheese.  I've had some in my pack for up to 5 days in the summer and it's still holding it's shape.  

4) Flavored Couscous - Near East brand makes some wonderful couscous flavors.  While I normally eat the entire box for a hiking dinner, a half portion works great for lunch for me!  Before hitting the trail, split the box evenly between two freezer bags.  Make sure to shake the box well before splitting if the spices are already mixed in with the couscous.  If you are making your own flavored blend at home, I find the 1/4 cup serving of dry couscous works well for lunch.  If it's a cooler backpacking trip you can heat up some water, but most of the time I just add cold water and let it soak for at least 15 minutes before I eat it.  Cold hydrating works very well for couscous!

5) Flavored Tuna and Flatbread - There are now several flavors of tuna on the market, including a few in olive oil instead of water.  Right now I'm loving the Mediterranean Style Sunkist tuna on a sandwich thin, but with all the flavors of tuna and salmon on the market right now it makes it easy to have a different flavor every day of the trip!

These are just a few of my favorite savory backpacking lunches.  Do you prefer savory or sweet foods on trail?  What is your favorite lunch?

I'm linking up with CourtneyCynthia and Mar and some of the other folks who link up with us – and please don’t forget to link to your hosts if you are participating!

Sloppy Joe's - a tale of a hiker's quest

When you're hiking for a day, a weekend, or even for a month there is one thing every conversation will inevitably turn to - FOOD!  Usually more than once a day we would find ourselves hit with a hardcore craving for food, usually something so impossible to access in the small town resupply stores that the idea of it was absurd.  For NoKey and I in 2012, our food porn was all about Sloppy Joe's.  When we were hiking in Damascus, VA, we did what is called a slackpack.  This is where you leave the majority of your gear in town and take only water and food for the day.  Someone will drop you off and you walk back to your gear.  You can hike out of town, but still come back to town that night.  We did an 18-mile slackpack in 5 hours that day and we hiked back into town, starving of course.  We went to a place in town called Dairy King. The special that evening was Sloppy Joe's with tater tots.  We thought about getting them, but instead we grabbed a burger and a milkshake (blueberry and chocolate peanut butter, respectively) and vowed to go back to Dairy King before we left town the next day for what would undoubtedly be the best meal ever - Sloppy Joe's.  When we left town the next day we discovered it was Sunday.  Sunday's are the WORST DAYS on the AT because it often means all these small businesses are closed.  We fought back tears knowing we had missed our chance for Sloppy Joe's and we talked about them every night for two weeks. 

When we got just south of Waynesboro, VA we had to stop at Dutch Haus, a bed and breakfast/hostel where they would cook lunches and dinners for hikers.  I had the norovirus, meaning I was essentially quarantined in the basement.  It was on this day when I could eat nothing, nor hold it down, that NoKey got not only his two Sloppy Joe's, but also both of mine since I had paid for lunch but could not eat it.  Again, I had missed my chance for Sloppy Joe's.  It was heartbreaking in the mind of a hungry hiker.  The next 1600 miles consisted of the both of us talking about Sloppy Joe's.  We never got them again.  

This story, however, is about to get an incredibly happy ending!  In developing our hiker meals for the summer I came across an article on Chef Glenn's website describing how you can dehydrate your own ground meat.  I had an epiphany: I could make Sloppy Joe's.  We could eat them SEVEN times a piece over the course of the summer!  The food porn that kept us going on our AT thru hike could now become a reality!  While it doesn't look very pretty in the bags, it's going to be incredibly tasty in our stomachs this summer! (Scroll down for recipe!)

It's not pretty, but it will be tasty!

It's not pretty, but it will be tasty!

The first thing this recipe is going to require is that you cook and dehydrate your meat.  I chose a 93/7 Ground Turkey as fat is a big "no-no" when you're trying to preserve items.  I did 1/2 cup of breadcrumbs mixed with 1 pound of turkey meat before I cooked it.  This helped absorb any remaining fat and kept the meat incredibly dry for the cooking process.  While this isn't really ideal for most conditions, for dehydrating it is a must!  I dehydrated the meat at 145 degrees for 7 hours before it was completely dry.  

For the sauce, you can just use your favorite canned brand or you can make your own.  To dehydrate sauce, spread it in a thin layer over a silicone sheet or a piece of parchment paper on your dehydrator tray.  This dehydrates at 135 degrees for 8-10 hours.  After six hours your sauce should be dry around the edges and gelatinous in the middle.  You will take the sheet it's on, flip it upside down, and peel it off like a fruit roll up, placing directly onto the dehydrator tray.  Let it dry until it's crisp. When it's dry, break it up into smaller pieces and put it in an airtight container until you're ready to package your Sloppy Joe's!

Sloppy Joe "roll ups."  These might be good all on their own!

Sloppy Joe "roll ups."  These might be good all on their own!

Sprinkles' Sloppy Sammiches - 2 servings
-1 lb dehydrated meat of your choice (using the information above)
-1 can dehydrated Sloppy Joe sauce OR 1 recipe worth of homemade sauce
-2 tsp dried onion flake
-1/2 tsp paprika
-1/2 tsp garlic powder
At home prep: 
+In two vacuum sealer bags, split the meat and the sauce leather evenly into two portions. Add 1 tsp dried onion flake, 1/4 tsp paprika, and 1/4 tsp garlic powder to each bag.  Seal them with the vacuum sealer.  (This step is important with dried meat to keep it from spoiling!  If not using within 1 month, keep it in the fridge). 
Trail Prep:
+Pour the contents of the vacuum sealed bag in your pot and pour over just enough water to coat the contents.  Heat the contents to a boil, turn off the heat, and cover.  Let it sit just enough to hydrate everything thouroughly.  
+Spread mixture evenly between two sandwich rounds and enjoy your trail Sloppy Joe's!

Trail Magic and Trail Food Cravings

Yesterday we made a surprise trip down to the Finger Lakes Trail to pick up our friends Buttons and Bearwalker.  They're thru hiking the North Country Trail, 4500 miles from Vermont to North Dakota, and needed a ride to the post office.  Since New York isn't exactly hitchhiker friendly, especially when people aren't used to seeing them, they only had a short amount of time to get to their resupply box, which had their dog food in it.  Since Molly  had run out of food and the post office was closing soon, we rushed down to get them, getting them to the post office at 5:05 p.m.  Even though they closed at 5, the postmistress still allowed them to pick up their package!  We got to hang out with them last night and have hiker talk, eat large amounts of food, and look at all their gear.  It was a great time with them and we dropped them back off at the trailhead today.  

When we got home I was pretty hungry and, probably due to being in full on hiker mode for the day, was craving ramen.  Yes, ramen!  The cheap staple of broke American diets and thru hiker cuisine de jour.  Since I was whipping up a ramen recipe for us to take on the trail, I figured it would be the perfect time to test out the spice blend I was planning on using on our batch.  With the fresh veggies I added from the fridge,  I had a steaming bowl of hiker supper!

Ramen with broccoli, portobello mushroom, red onion, and carrot.  

Ramen with broccoli, portobello mushroom, red onion, and carrot.  

Here's the trail recipe I developed tonight, and a photo of how nicely it all packs out to camp! (Links provided for hard-to-source ingredients!)

Thai Ramen, packed and ready to hit the trail!

Thai Ramen, packed and ready to hit the trail!

Thai Ramen - 1 serving
1 pack ramen of your choice (chili lime shrimp would be perfect!)
1/4 cup dehydrated mixed vegetables
1 tablespoon powdered coconut milk
1/2 tablespoon powdered peanut butter
1 tablespoon cashews
1 True Lime packet
1 Sriracha packet
At home prep:
+In a snack-sized zipper bag, combine the cashews, powdered peanut butter, and powdered coconut milk.
+In a regular-sized zipper bag, pour in your dehydrated vegetables, place a ramen packet inside, and add the packet of True Lime and sriracha sauce. 
+Add the snack-sized bag to the large bag and seal
In Camp:
+Remove the bag with the coconut powder, peanut butter, and cashews.  Also remove the True Lime and sriracha sauce. 
+Break up the ramen in it's pack, then open it and pour the ramen and the vegetables in your cook pot.  Remove the ramen seasoning packet and cover the noodles and vegetables with the water level you chose for your soup. 
+Cook ramen according to package directions and turn off the heat.
+Add the ramen seasoning, powdered coconut milk, peanut butter, cashews, and True Lime packets.  Add sriracha sauce to your desired level of spiciness.  For best flavor, allow the mixture to cool off and let the flavors meld together. 

More food prep!

14 servings of mushroom stroganoff and a box full of hiker condiments at my house today! 

14 servings of mushroom stroganoff and a box full of hiker condiments at my house today! 

More than 7 pounds of mushrooms are cooked down and in my dehydrator this morning.  My box from minimus.biz showed up this morning too!  I've got individual sized packets of Franks, Cholula, lime juice, sriracha, and salsa for our meals this summer. 

Logistics - the not-so-fun part of hike planning

Here I am, three days into my 'fun' employment and I'm going stir crazy.  Over the past few days, I've managed to spend several hundred dollars on pieces of gear we need for our hike and the beginning of our food budget.  I've spent the better part of last night and this morning preparing our menu.  Turns out sending yourself food is harder than I thought it would be!

On our AT thru hike and then working in the most remote part of Maine, we learned a very key piece of information for resupply - a good grocery store is really only a hitchhike away.  Sure, it might not be in the guide book, but if someone is willing to pick up a smelly hitchhiker, they're probably willing to give you information and a ride to the nearest real store.  Unfortunately, we also learned that sometimes these small town groceries just aren't going to cut it for trail food.  I've planned to dehydrate meals for the first two of our three hikes.  Even though the Benton MacKaye Trail is starting to get more popular, the fact of the matter is that it isn't as established as the AT yet and getting a hitch will probably be tougher.  On the Finger Lakes Trail, especially the eastern portion, towns and stores are nearly nonexistent.  Once we get to the Ithaca area we'll have an easier time getting resupply, but some of these places in rural New York have notations in the guidebook reading "skip the hitch, there's nothing here." (Seriously, it says that!)  

For our resupply boxes, I've done the math allowing for three weeks on the BMT and five weeks on the FLT, a total of 8 weeks of meals - three meals a day plus two snacks.  This means 56 breakfasts, lunches, dinners, and 112 snacks per person.  This is overshooting a bit, which means we'll probably have extras we'll bounce back home, but that's okay!  That means we'll have a bit of leftover for the more rural northern sections of the Long Trail.  I've devised a meal plan that allows for 8 rotating meals, meaning we'll repeat each 7 times during the course of the summer.  Not too shabby for hikers who are used to eating the same things over and over and over to the point of exhaustion!  

Right now, the logistics include making conversions.  Since I'm going to be cooking, dehydrating, and portioning our food, I have to make conversions as to not overbuy supplies.  For example - one cup of dried rice equals approximately 3.5 cups cooked rice, which dehydrates down into 1.75 to 2 cups of rice depending on a few variables.  Now, since the rice I bought comes in a 5 lb. bag, how much rice do I need for all of these meals...? Feels like high school  math, right?!  Since my head was starting to spin, I decided to take a quick break and write a blog post to update everyone on what we were planning.  I'm going to do a post in the future with all our meals and how they look in a few weeks when all the cooking is done.  

Have any of you done any dehydrating?  I'd love to hear how it went, how many extra meals you ended up with, etc.  

Trail recipe review: Vegetarian Brunswick Stew

After lots and lots of hard work, I had a batch of six dinners made up for some overnights.  Brunswick stew is traditionally a southern dish made with chicken or pulled pork, beans, okra, onions, etc.  There are many variations on the stew and I adapted my recipe from Tim and Christine Connors’ version in the book “Lipsmackin’ Vegetarian Backpackin’”. Here’s what you’ll need for my version:

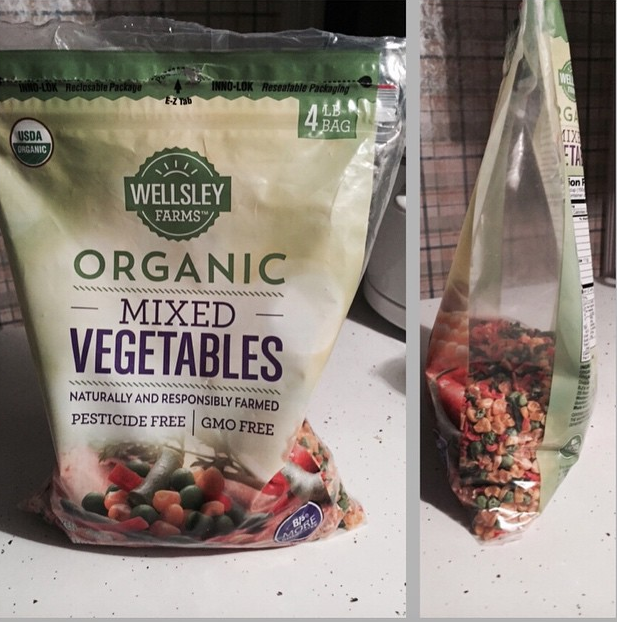
-1 lb bag of baby lima beans
-1 lb bag of frozen corn of any variety
-1 lb bag of frozen hash browns (southern style or regular)
-1/2 cup of dried mixed bell peppers
-6 vegetable bullion cubes
-3/4 cup of TVP (textured vegetable protein); I tried to find a ham-flavored or a bacon-flavored, but had no luck - those flavors would be great!
-1/2 cup dried onion
-8 teaspoons of tomato powder (really crazy expensive, it’s best to make your own by dehydrating tomatoes and pulverizing them in a blender)
-1/2 cup of instant potato flakes
-Fresh black pepper to taste

Pre assembly prep work: You’ll have to dehydrate all the frozen and fresh stuff first.  The beans, corn, potatoes, bell peppers, and onions will all have different drying times as according to your dehydrator.  Be sure to consult your book for precise temperature settings and hourly times to get your stuff dry.  Also, do the onions on their own!  Otherwise, everything in the dehydrator with them will taste and smell like onion! On onion day, I highly recommend putting the dehydrator outside.  The smell is incredibly strong!  

For the tomato powder, I took five large heirloom tomatoes and sliced them thin, about 1/8 of an inch, and put them in my dehydrator for about 10 hours.  You’ll want to keep checking them to make sure they’re drying evenly.  You want them to be extremely brittle and breakable. After they’re completely dried out, put them into a blender or Magic Bullet and pulverize them.  Voila! You have tomato powder, which is extremely rich in flavor and takes up so much less space in the pantry. For  a more detailed explanation how to make it, check out this YouTube video: https://www.youtube.com/watch?v=kdb5cKnupj8

So, all your ingredients are dry and ready to be mixed! Here we go:

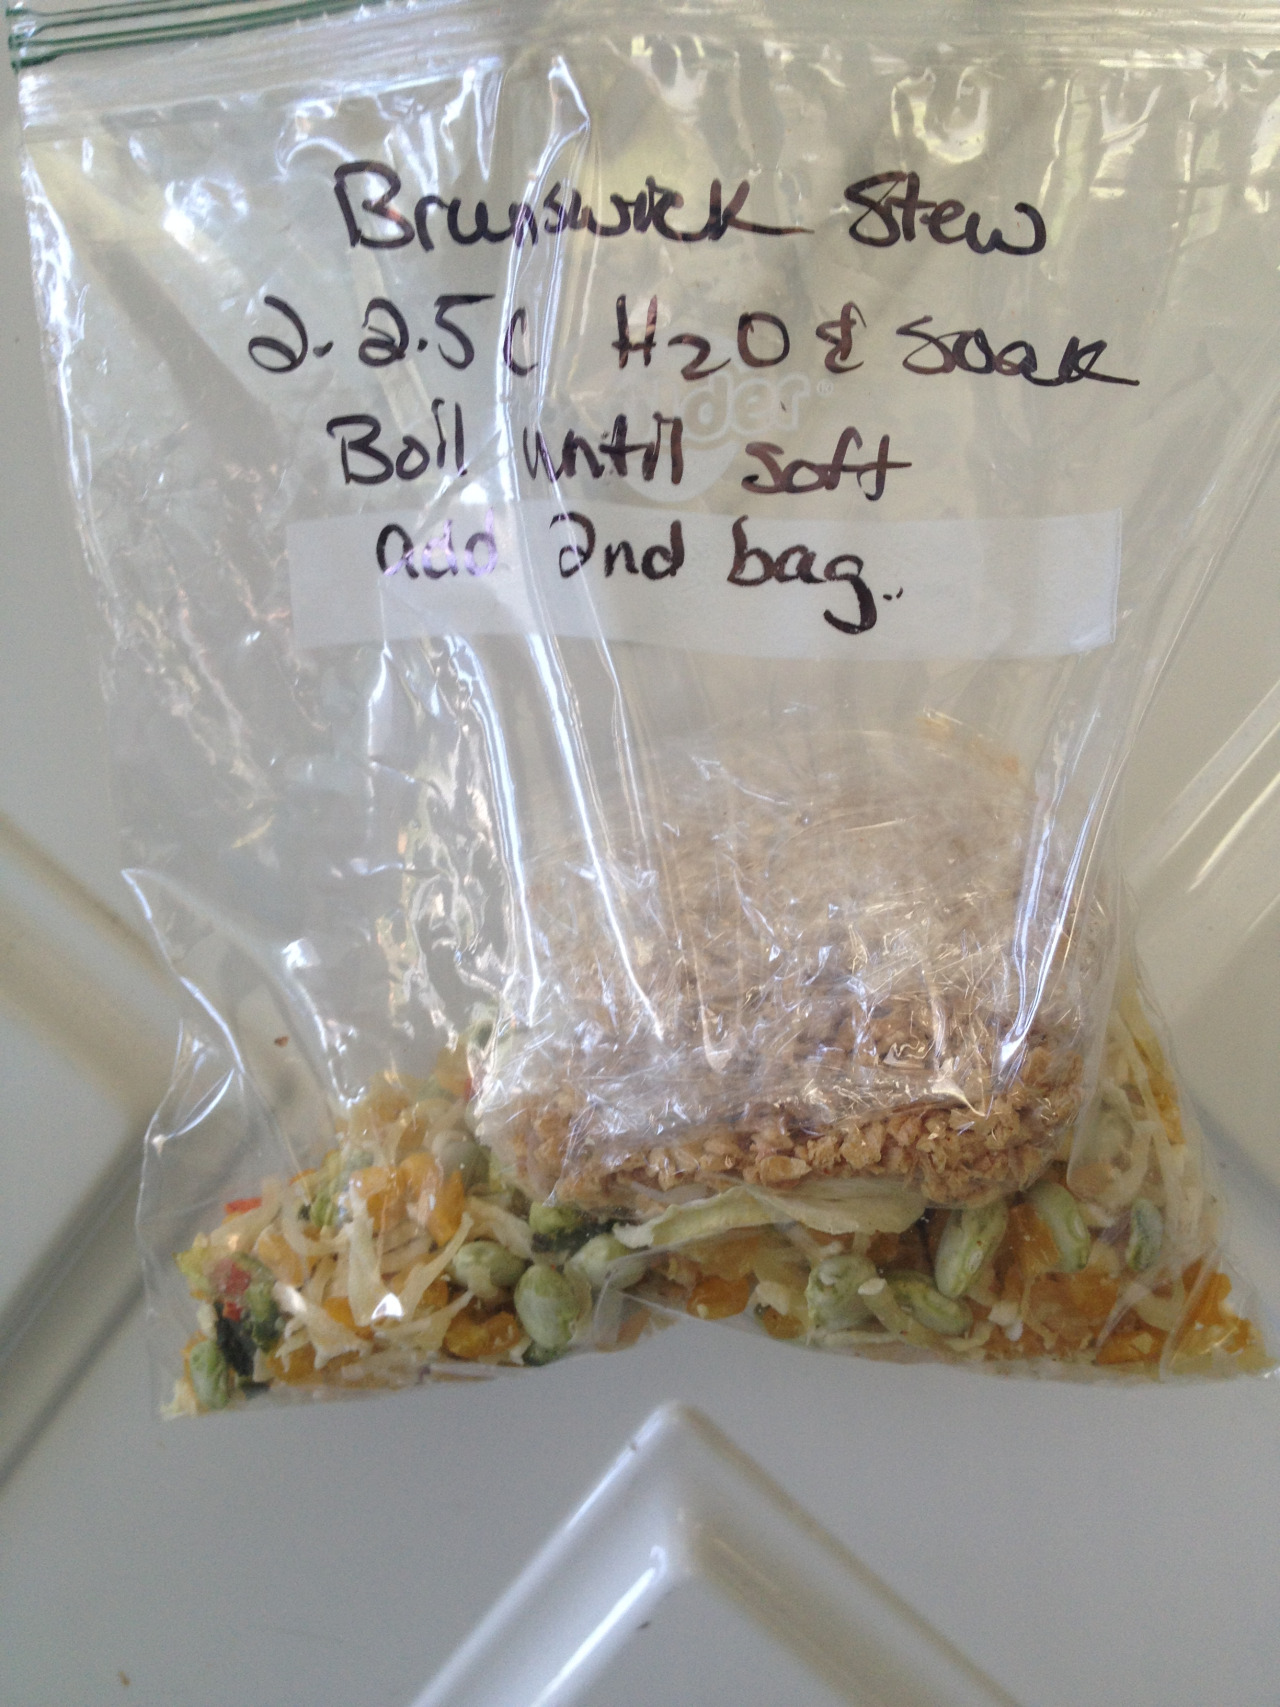
In a large bowl, combine the dry beans, corn, hash browns, and bell peppers and mix well.  Using a 1 cup measuring cup, divide the bowl into six freezer bags.  This will be your storage bag for the meal.  

Now, on six pieces of plastic wrap, place one bullion cube in the middle and crush it.  Now evenly divide up the dried onion, add 3 tablespoons of TVP, 2 teaspoons of tomato powder, 1 tablespoon of potato flakes, and some fresh ground pepper.  Wrap this bundle up.  Now you have your two separate bags.  Put the plastic wrap bundle into the large freezer bag.

Directions for camp cooking: 
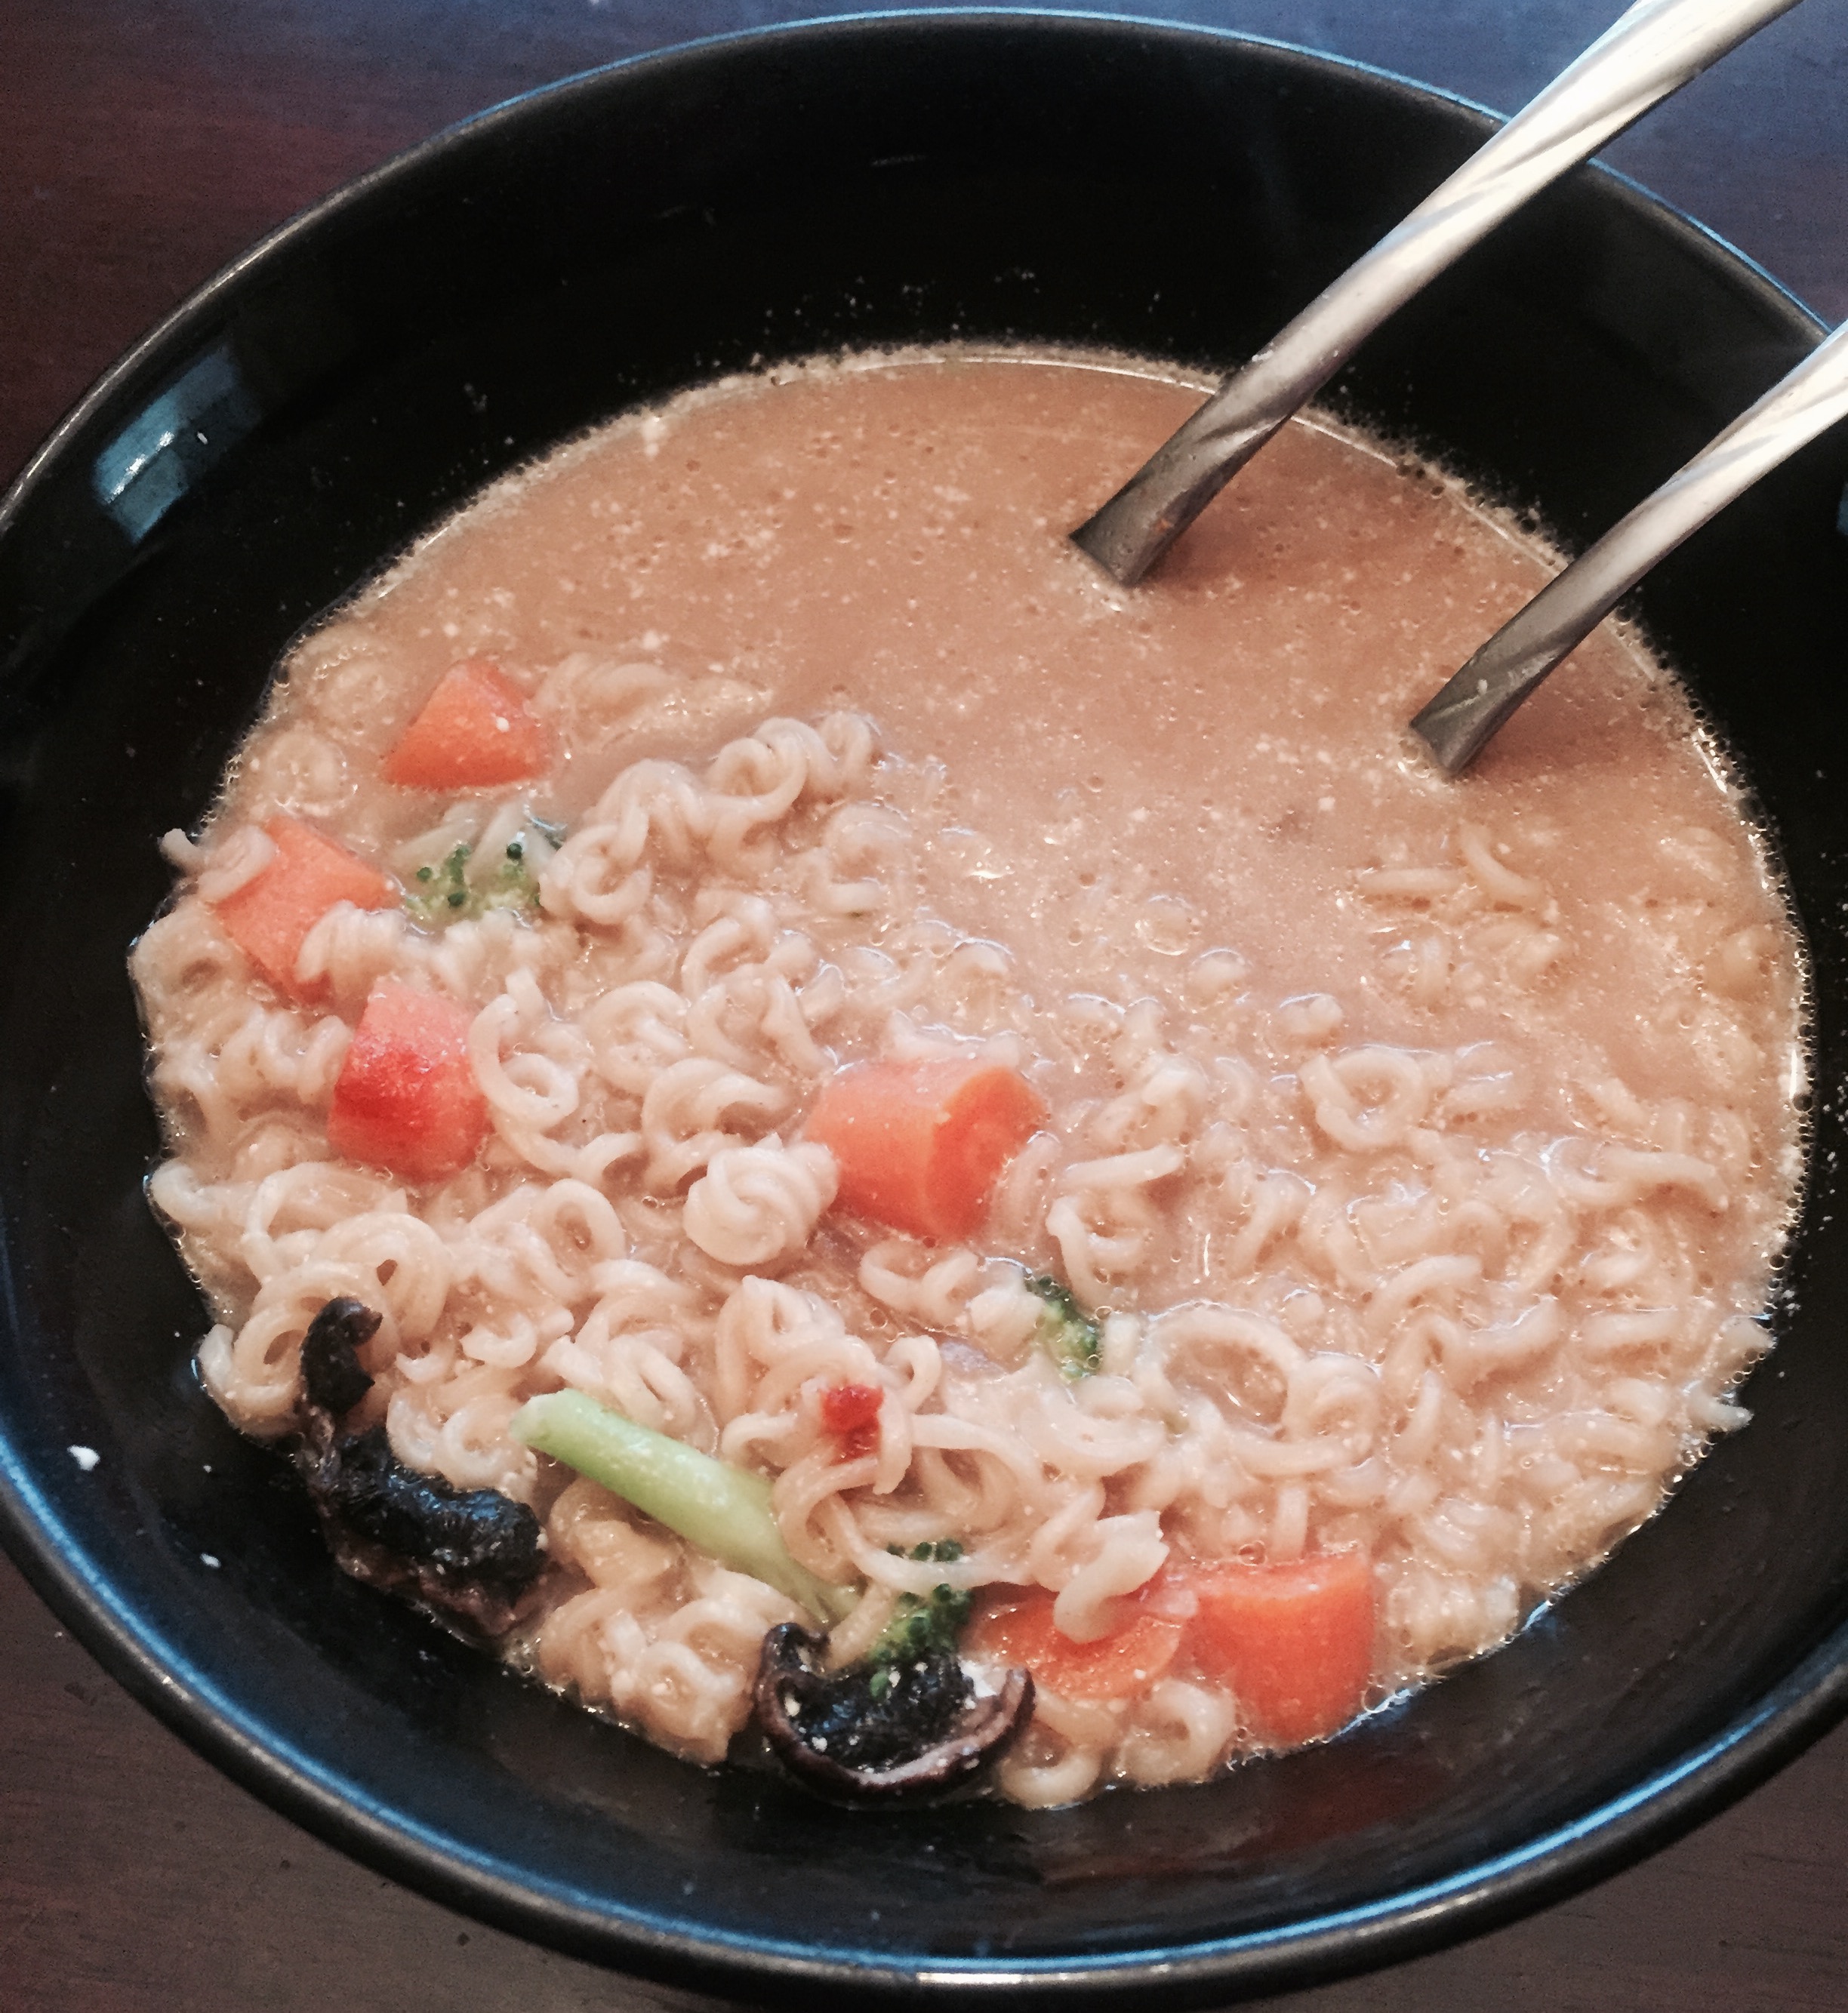
We always presoak our food to save on fuel.  Remove the bundle of plastic wrap and set it aside.  Pour 2 cups of water into the freezer bag with the dried vegetables and let it soak, up to 30 minutes.  Dump the bag of water and semi-rehydrated veggies into your pot and bring to a boil.  After about 3-4 minutes, check your veggies for softness.  You’re looking for a good “al-dente” texture to them.  Turn the heat off, cover the pot and add the contents from your plastic wrap bundle.  Stir in well, cover, and let it set up for 3-4 minutes.  The reason the bundle is added in after turning off the heat is to prevent the contents of this bag from scorching or sticking to your pot.  Of note, I would recommend abbreviating these directions and writing them on the freezer bag, like in my photo above.  That way, you won’t be stuck remembering how to cook it in camp!

We liked this meal quite a bit.  It is vegetarian and we aren’t, but man was it filling!  The fiber from the beans and the protein from the beans and TVP kept us both full all night after hiking a 15-mile day.  The only thing we wished we had was salt.  I feel like salt would really bring this meal a little bit more together.  Clean up for this wasn’t difficult at all due to the instant potatoes, which act like a scouring agent in the pot and make it easy to wipe out with a baby wipe and rinse clean.  Hope you enjoy it!