Trail Food

Mountain House Meals - Meal Reviews

No matter how warm the weather, I like a hot meal while I'm backpacking.  I often cook both breakfast and dinner on trail.  While many hikers go no-cook or stoveless, I just don't think I'll be one of those hikers.  A warm meal is always my favorite way to start and end my day.  When it comes to cooking though, I like to keep things easy.  That sometimes means I'll turn to a freeze dried meal for simply heat-and-eat with no cleanup.  When Mountain House offered to send me two new meals to try, I was excited to give them a try.  

Mountain House Meals.png

Disclaimer: I received these meals in exchange for writing the review.  All opinions are unbiased and are my own.  

On a recent getaway I didn't leave myself much time to plan a trip.  On those spur-of-the-moment adventures it's great to have a few freeze-dried  meals I can throw in my pack and not have to worry about making sure I have all the ingredients.  Since Mountain House sent me two meals - Spicy Southwest Breakfast Hash and Homestyle Turkey Dinner Casserole, all I had to do was grab a few snacks, a quick lunch, and head out the door!

After a long day of hiking, I was excited to try the Homestyle Turkey Dinner Casserole.  Thanksgiving is a favorite meal of mine and I absolutely love turkey pot pie, so getting to have it in the backcountry was an added bonus!  The first thing I was struck by with this meal was the fact that there were real ingredients inside - check out the label: 

Real ingredients with easy-to-follow instructions. 

Real ingredients with easy-to-follow instructions. 

It was so simple to make this meal too!  The instructions tell you exactly what you need to do.  You'll even have time to set up your tent while you wait! This meal was really good and definitely reminded me of casserole.  Instead of the stuffing being on top, it was all mixed in and was super tasty!  The only thing missing was some green bean casserole!

Dinner on a pond in Maine - does it get any better?!

Dinner on a pond in Maine - does it get any better?!

When it came time for breakfast though, I was ready for some big flavors to accompany my coffee.  Enter the Spicy Southwest Breakfast Hash.  With the promise of having the "perfect amount of hot sauce" I'll admit I was skeptical.  All hikers love their hot sauce, and I'm no exception to that rule.  With hash browns, corn, black beans, chiles, and shredded beef, I knew I'd be nice and full for my hike out too.  After removing my oxygen absorbing pack and adding hot water, I impatiently waited to stir and eat.  

Don't worry - it won't hurt you!  Just take out the oxygen absorber and add water!

Don't worry - it won't hurt you!  Just take out the oxygen absorber and add water!

To my surprise, Mountain House was right - there was a decent amount of spice in this meal, but not too hot.  I didn't feel the need to add any additional hot sauce to my breakfast, which isn't always the case.  My favorite thing about this meal is the fact that it DIDN'T have eggs in it.  I'm not the biggest fan of freeze dried eggs, which you'll find in their other savory breakfast meal.  The fact that I got to eat potatoes and have a savory breakfast was definitely a bonus for me that morning!  This meal would be great with an avocado on the side or even with some warm tortillas!

If you're looking for an easy way to hit the trail with minimal clean up, these Mountain House meals are the way to go.  Having a filling, savory meal for both dinner and breakfast the next morning really helped me enjoy my hike.  

Have you tried either of these meals?  What are your favorite freeze dried meals? 

Chicken Piccata - a Trail Recipe

Add subheading.png

For the past two weeks, I've been doing lots and lots of meal prep.  For those of you who don't know, for thru hikes less than 1000 miles I prefer to do all of our meals as mail drops instead of resupplies.  In doing a trail like the Mountains to Sea Trail, we are giving up the convenience of being able to easily get into town, especially for the first several hundred miles.  We will be mostly parallel to the Blue Ridge Parkway and it makes it much easier for us if we do drops instead.  Our first mail drop will consist of a post office less than a quarter mile from the Parkway and our second will be at a hotel that sits right on the Parkway.  Having mail drops right on the trail is so much easier than trying to hitch off a scenic byway and get back up to it - especially on a trail that doesn't see so many thru hikers!  

While I was going through my favorite recipes for this trip, I decided to use a few of our old favorites, as well as test out some new recipes.  I also decided to attempt and create one of my favorite dinners - chicken piccata.  I know Backpacker's Pantry offers this as an option, but at $11.00 per meal (and it's definitely not a two-serving meal at only 350 calories per serving!) this is not only cost prohibitive, it's also bulky in their big packaging.  I decided to see if I could recreate this meal at home with dehydrated products and I am super excited with the results!  Being able to have one of your favorite meals on the trail is a great way to end your day.  The recipe for you to recreate is below. 

Sprinkles' Chicken Piccata

1 cup of dried pasta of your choice (I recommend small pasta, like farfalle)
1/4 cup freeze dried chicken (or dehydrated canned chicken)
1 tablespoon of dried capers* (see below for instructions)
2 teaspoons butter powder
1/4 teaspoon (or one packet)  True Lemon powder

Directions: 
At Home:  Take the 1 cup of dried pasta and the 1/4 cup of chicken and combine in a sandwich-sized Ziplock bag.  Combine the capers, butter powder, and lemon powder in a separate snack-sized Ziplock bag.  Place the smaller bag inside the larger bag and seal. 

On Trail: Remove the small Ziplock containing the "sauce" powders and capers and set aside.  Dump the pasta and chicken into your cook pot and cover with water by a 1/2 inch.  Cook on a low flame, stirring to make sure the pasta doesn't stick to the pot.  When your pasta is done, you shouldn't have a ton of extra water in your pot - just starchy water barely covering the pasta and chicken.  Add the powder and capers from the smaller bag directly to the pot and turn off the heat.  Let it sit for a few minutes to rehydrate the capers and enjoy directly from the pot.  

*To make dehydrated capers, drain capers from their brine and place on a fruit leather sheet or piece of parchment paper on your dehydrator tray.  Dry at 135 degrees for approximately 4-6 hours (depending on the humidity), until they are leathery, but dry.  If you don't own a dehydrator, you can always place them on a baking sheet and put your oven on the lowest possible setting with the door cracked open for 2-4 hours.  

What is your favorite meal at home?  Would you ever attempt to recreate it on trail? 

A Mountains to Sea Trail Update

It seemed like spring would never arrive a few short weeks ago, but now we're midway through February!  I've been feeling like I'm doing a good job at my New Years' goal of unplugging more, but at the same time I always like to update my readers as to what is going on and what our progress is on thru hike prep.  Major progress is being made and I'm super excited to share it with you guys!

Mountains to Sea Trail Update.png

Menus are finalized!

While for long hikes I'm a big fan of resupplying on the fly, for shorter hikes (1000 miles or less) I prefer to make our own meals.  It's a lot easier on a trail like the AT to resupply in towns or at gas stations, even for those with special dietary needs.  However, when you're on a smaller trail like the Benton MacKaye or the Finger Lakes Trail, doing your own resupply boxes ahead of time is pretty clutch to making your hike work better for you.  Since we're only doing about 45 days on this trek, I decided to go ahead and plan a menu and resupplies.  Here's a small sampling of what we'll be bringing!
 

Breakfast: Fig Newtons, Poptarts, and homemade granola with coconut milk for NoKey; breakfast rice, couscous, oatmeal, and homemade granola with coconut milk for Sprinkles. 
Lunches: Shelf stable bacon with mustard on bagel thins, pepperoni sandwiches, dry hummus and crackers or fresh veggies if we can find them. Homemade granola will work for a sweet lunch as well. 
Dinner: Staples like trail mac 'n' cheese and my favorite Thai Style Ramen always make an appearance, but this time I'm going to make some new dinners like Prosciutto with Peas and unstuffed peppers.  I'm even attempting a chicken piccata recipe!
Snacks: We are going with Lenny and Larry's cookies and RX bars on this trip, with an assorted mix of candy bars in there to keep it interesting!

Drop box locations are still TBD

I honestly just haven't done the research on where I want to send boxes yet.  I've got a pretty good idea of where we'd LIKE to send them, but I still need to narrow that down.  One thing we definitely know is that we'd like to stay at The Pisgah Inn if at all possible and will probably resupply there if we can!  We had lunch here for the first time last year on our 5th Anniversary and fell in love with the place.  It doesn't hurt that it's smack dab on the MST near Asheville. 

Mixing it up a little

The Mountains to Sea trail is so much fun to me because it's not a strict thru hike if you don't want it to be.  In fact, there's a paddling route you can do by kayak and you can bike the road sections (and beach!)  I'm having a lot of fun planning our canoe trip portion and trying to figure out where we can drop our bikes for the last section of trail.  

Planning a thru hike, since I've done it a few times now, is actually a lot of fun for me.  When I first set out onto the AT it was so incredibly overwhelming to plan even my resupply stop at the store, but now that I'm better at estimating my mileage and my appetite I find it almost exciting!  Being able to plan out a trip and know your needs is a great feeling.  

Have you ever planned a distance hike? Did you have to make any changes on the fly? What was your favorite and least favorite part of planning?


Soul Food - A Trail Recipe

While some hikers love easy, no cook dinner options I happen to be one of those hikers who just loves a hot meal, no matter how hot it is outside! To me, a hot meal can really end my day on a good note.  Was it hot and nasty today? A good meal makes me feel better.  Cold and drizzly?  A hot meal warms me up and sends me to bed happy.  Now, imagine you’re having a tough day out on the trail and you open your food bag to see that you left yourself your absolute favorite dinner for tonight.  This moment can not only change your day, it can sometimes change your entire outlook!  One of those trip altering meals I had on the Benton MacKaye Trail was this one - Soul Food.  I adapted it from the book Lipsmackin’ Vegetarian Backpackin’ and it was definitely one we think about even off trail!  If you wanted to take this meal to the next level and you aren't vegetarian, you could even add in chunks of summer sausage!

Soul Food - 1 serving

1/2 heaping cup brown rice, dehydrated and cooked in veggie stock
1/3 cup of precooked and dried black-eyed peas
2 tbsp onion soup mix (here’s the recipe I use, but you can use store bought Lipton brand)
1 tsp onion flake (in addition to your soup mix!)
1/8 tsp black pepper
1/2 tsp parsley flake
1/2 tsp cajun/creole seasoning
1/8 tsp cayenne pepper
2 tbsp bacon bits/TVP
1 pack Cholula hot sauce
Optional: Slices of summer sausage

At home: Add all ingredients to a zip top bag and seal.  Shake to combine evenly.  Add one pack of Cholula hot sauce to the bag before packing.  

On trail: Pour contents of the bag into your cook pot, minus the hot sauce, and cover with water, leaving approximately 1/2 to 1 inch of water extending over your ingredients.  Bring to a boil, stirring occasionally.  Take off the heat, add sausage if you'd like, and let meal sit for 5-10 minutes.  Check the texture of the beans for doneness before adding hot sauce and digging in. 

Dal with Rice - A Trail Recipe

Indian cuisine is so delicious - all those earthy flavors with a hint of spiciness.  When I’m out hiking a long trail any time I see a town that has an Indian restaraunt I’m spending my days and nights dreaming of that food!  When I was hiking the AT in 2012 one of my favorite “Treat Yo’ Self” meals came in the form of the ready-to-eat India Kitchens meals.  Granted, they’re heavy and you have to eat them basically your first night out of town, it always made me smile to see hikers turn their heads to see where that delicious smell was coming from.  You’d be the most popular hiker in camp when you had Indian-style meals!  Since India Kitchens is heavy and a bit cost prohibitive, I set out to make my own Dal for backpacking.  Below is my favorite dal recipe, dehydrated and packed up for a backpacking trip!

Dal with Rice - 1 serving

1/3 cup dehydrated jasmine rice (I cook mine in veggie stock before drying)
1/3 cup dehydrated dal (see below)
1/4 cup mixed dehydrated mushrooms, eggplant, and bell pepper
2 tbsp chopped cashews
2 tbsp currents (or raisins)

At home: Add all ingredients to a zip top bag and mix well.  

On trail: Add contents of the bag to your cook pot and cover with water.  Bring meal to a boil, stirring occasionally to avoid sticking.  Once the meal boils, remove from heat and set aside for 10 minutes, stirring occasionally to meld the flavors.  

My favorite dal recipe:

2 Tbsp of butter or ghee
1 small onion, diced
4 cloves of garlic, minced
1 tsp whole cumin seeds (crushed to release flavor)
1 Tbsp of Garam Masala
1 tsp turmeric
2 tsp salt (maybe more)
2 tsp curry powder
2 serrano chiles, chopped small (seeds removed if you wish)
2 cups of red lentils
3 cups (approximately) of chicken or veggie broth
1 can of diced tomatoes

Sautee the onion in the butter/ghee until slightly caramelized. Then, add in your garlic, chiles, and spices.  Cook until very fragrant, only about 1-2 minutes.  Add your lentils and your stock, covering the contents of your pot about half an inch or so.  Cook until your lentils are halfway cooked, soft outside but still firm in the middle.  Add in your tomatoes and cook down until lentils are soft.  Taste for saltiness and add salt to your liking.  Let your mixture cool to room temperature before adding to food processor or blender to puree.  

To dehydrate your dal, spread the mixture in a thin, even layer on a fruit leather sheet or parchment paper.  Dry in your dehydrator on 135 degrees until it begins to crack and dry, resembling chalk.   

Sweet Breakfast Rice - Trail Recipe

Breakfast recipes on the trail can be hit or miss for some people.  While some hikers prefer to walk and eat, others prefer waking up with a full breakfast to keep them going in the morning.  Before I became a distance hiker I wasn't much of a breakfast eater.  After I got into my trail routine, however, I quickly realized that if I wanted to have any kind of energy before noon I needed to eat a few times in the morning.  In 2015, when we were setting out to do our thru hikes around the east coast, it was very clear that I'd need to make breakfasts for myself as NoKey definitely falls into the "walk and eat" category of backpackers.  I found myself focusing on flavors I loved and that's where this recipe came from.  

Back in the day, well, back in 2008 when I first started backpacking, there was a brand of commercial foods called Enertia.  They had an amazing breakfast I loved called Cherokee Rice Pudding and it was a sweet breakfast you could eat hot or cold.  I knew when I was setting out to create breakfasts for myself that Cherokee Rice Pudding would need to be recreated.  Sadly, Enertia was bought by Coleman several years ago and the food brand was phased out.  Since I couldn't find the ingredients online I recreated my own special version of Sweet Breakfast Rice. 

Sweet Breakfast Rice (2 servings)

1/2 home dehydrated basmati rice, cooked in vanilla almond milk before drying
1/4 cup dried tropical fruit of your choice (I love to mix it up!)
2 tbsp slivered almonds
1/2 tsp sugar
1/4 tsp cinnamon

At home, mix all ingredients together in a small mixing bowl making sure to evenly distribute all flavors.  Split in half amongst two zipper bags and seal. 

On Trail: Add ingredients to your cook pot and bring to a boil.  Let sit until cool enough to eat or until you reach desired texture.  

Breakfast Couscous - Trail Recipe

Breakfast is definitely my favorite meal of the day.  I don't always eat it first thing when I get up, but I can promise I eat a proper breakfast of some kind every single day.  Trying to get in a healthy breakfast while out on the trail can be tough, especially with all the convenient grab and go options out there.  Getting ready for my Tahoe Rim Trail thru hike in 2017 has me prepping lots of easy breakfast options and breakfast couscous is a quick and easy go-to that I enjoy both on the trail and when I need to grab something quick to take with me.  

Breakfast Couscous (2 servings)

1 cup whole wheat couscous
1/3 cup dry coconut milk
2 tbsp brown sugar
3/4 tsp cinnamon
1/4 nuts of your choice (slivered almonds are my favorite!)
1/4 dried fruit of choice

At home: Add all ingredients to a mixing bowl and stir to combine, paying attention to the brown sugar as it has a tendency to clump.  Once all items are mixed, split into two portions in zip top bags.  Seal. 

On Trail: To eat cold, add cold water to your couscous before going to bed - just enough to cover the couscous by about an inch.  Seal the bag and squish it to mix.  Eat cold in the morning.  If you'd like it hot, add couscous to your cook pot and cover with water, about an inch to an inch and a half over the mixture.  Bring to a boil, remove from heat, stir, and let cool.  

Trail Mac 'N Cheese - Trail Recipe

There are fewer meals hikers love more than Mac 'N Cheese.  When I was thru hiking on the AT, Mac N Cheese night more often than not meant a box of the cheapest stuff at the store without any milk or butter to make it more delicious.  Then, you’d wipe the pot clean with whatever kind of bread you had to clean it up.  Mac 'N Cheese is a fun comfort food, but when you’re making your own meals with nutritional factors in mind a box of the cheapie stuff just won’t do.  Here’s my recipe for Trail Mac that will definitely leave you wanting more!

Trail Mac - 1 serving

1/2 cup macaroni of your choice (does not need to be precooked!)
1/4 cup dehydrated veggies
1/2 tsp dried onion flake
1 tbsp + 1 tsp cheese powder
1 tbsp full fat powdered milk
1/4 tsp dried parsley
1/8 tsp garlic powder
1/8 tsp cayenne pepper
1/8 tsp paprika
1/8 tsp red pepper flake

At home: Add the macaroni, dehydrated veggies, and onion flake into a sandwich size zip top bag.  Add the cheese powder, milk powder, and spices to a smaller snack size zip top bag and mix to combine.  Seal the smaller bag, add to the larger bag, and seal.  

On trail: Add macaroni to your pot and cover with water (just to the tops of the pasta).  Bring to a boil, stirring every few minutes to avoid sticking.  Cook pasta to desired level of doneness and stir in the contents of your spice/cheese packet.  Let meal sit, stirring occasionally, until the sauce thickens.  

Hawaiian Rice - Trail Recipe

Since NoKey and I are getting ready to tackle another thru hike in 2017 I thought I'd start sharing some recipes with my readers.  A few years ago, when we took off to do a series of smaller thru hikes, I decided to attempt home dehydrating all our meals for a few reasons. Home dehydrated meals are economical and a lot more healthy than just eating a few of the same Lipton Sides over and over again.  It keeps your tastebuds and your wallet happy!

One of our favorite recipes a few years back turned out to be Hawaiian Rice.  This also was the first meal we ever ate out on the Benton MacKaye Trail.  I wanted to eat it first because I was entirely convinced I'd hate it.  This one, however, became an instant hit!  Every time we'd see it in our resupply boxes we'd do a happy dance.  Check out my recipe for Hawaiian Rice below!

Hawaiian Rice (1 Serving)

1/2 cup home dehydrated brown rice (cooked in veggie stock)
2 tbsp home dehydrated pineapple
1 tbsp home dehydrated bell pepper (broiled and blackend before dehydrating)
1 tbsp dried onion flake
1 tbsp unsweetened flaked coconut
1/4 tsp salt
1/4 tsp powdered ginger
2 tbsp bacon bits or ham-flavored TVP
1/2 tsp ham base

At home:
Add the rice, pineapple, bell pepper, onion flake, coconut, salt, and ginger into a sandwich size zipper bag and mix well.  Add the bacon bits/TVP and ham base to a snack size zipper bag and mix well; seal the bag.  Add the small zipper bag into the larger bag and seal shut.  

On trail: 
Separate the two bags.  Add the contents of the large bag to your cook pot and cover with water - you are just covering the ingredients here, no need to measure.  Stir and then bring to a boil.  Stir and then remove from the heat.  Add the contents of the smaller bag and stir again.  Let meal sit for 5-10 minutes until it reaches your desired thickness and consistency and enjoy!

This recipe was adapted from Chef Glenn's Hawaiian Shrimp and Rice.  I cannot recommend his website enough if you're looking to learn how to make your own backpacking meals!

Have you made your own dehydrated meals before? How did it go? 

Dehydrator 101

After my big thru hiking announcement last week I've decided to share some of my favorite backpacking recipes with you guys; however, it occurred to me that while I'm whipping up a lot of these recipes like it's no big deal you might not feel that way too!  In fact, it took me a while to perfect my methods for dehydrating tasty meals.  Once you finally start to master techniques to make your food taste better, dehydrating your own backpacking meals is an easy "set it and forget it" option that not only can provide you better nutrition, but can also save you money on resupplies in tough areas.  Here's my quick and dirty guide to dehydrators - both purchasing and techniques to help you make your best backpacking meals.  

The Purchase

Buying a dehydrator is going to be an investment.  In fact, I'd look at it the way you look at purchasing a major kitchen appliance.  After doing plenty of research about what I'd like to use to make an entire season's worth of hiking meals I chose a 5-Tray Excalibur system with a thermostat.  The thing about dehydrating backpacking meals is that you aren't throwing them all in at one time.  First, you're dehydrating the mixed vegetables for a few days. Then maybe you're doing rice for a few days.  Then, you might be doing a few batches of sweet-flavored rice. You do everything in parts before assembling the meals.  Having a fan and a thermostat will help ensure you're dehydrating fruits and veggies at optimal temperatures to keep nasty bacteria at bay.  Meat, fruit, veggies - they all have optimal temps for pulling out moisture.  The thermostat will definitely make sure you're drying your food at the safest temperatures.  

While there are cheaper countertop models of dehydrators available, I definitely recommend going with a model with a fan for air circulation.  The round tray systems need constant babysitting to move the trays.  If you don't do this in a fan-less model, you'll have leather-like layers closer to the heat source whereas your top layers might not even be halfway dry.  You can definitely do months' worth of food on one of these budget models, but be sure you have the time to dedicate to rearranging the trays.  

Finally, you'll need a set of fruit leather trays for your dehydrator.  You can again go the budget option and use parchment paper.  I went with the generic fruit leather reusable inserts on Amazon.  I've reused them countless times for the past three years and they don't hold flavors and just need a quick rinse.  I highly recommend them.  Aren't planning on making fruit roll-ups?  That's fine - neither did I!  But, you'll need these guys to dry sauces, veggie paste, even condiments you'll want to dry to make them more potent.  Trust me, you WANT these tray inserts!

Techniques

So you've purchased your dehydrator and you've found a couple of recipes you want to try out.  Maybe you want to try and recreate one of your favorite pasta sides at a fraction of the price you'd pay for them over the period of a distance hike.  Either way, it's time to start dehydrating.

Rice

Let's say your recipe calls for you to use your own dehydrated rice for a savory recipe.  Instead of just making plain rice like you'd make at home, I highly recommend seasoning the rice before you get it into your dehydrator.  If you're making a savory dish, I recommend cooking your rice in chicken, beef, or vegetable stock and salting it slightly heavier than you would eat at home for a normal meal.  On trail, you'll wish it had more salt!  After the rice cooks, cool it to room temperature before dehydrating.  Making a sweet rice - maybe for a pudding or breakfast treat?  Try cooking it with vanilla almond milk instead of water!  When it comes time to dehydrate your rice, spread it out thinly and try to avoid clumps of rice.  Clumps will hold more moisture and take longer to dehydrate.  If you're home while it's dehydrating, go out and break up the chunks of rice every so often to help it dry out faster.  

Vegetables

Not all frozen veggie mixes are created equally!  My favorite store, Aldi, has mixed veggies in a bag as cheap as $0.95!  However, their mixed veggies aren't all the same size and, in fact, the carrots are in rounds that are easily four times the size as the other vegetables.  This doesn't make for fast dehydrating OR rehydrating!  On the flip side of this, Wegmans makes a great mixed veggie blend with the exception of the lima beans.  Lima beans are another rehydration nightmare.  I don't care how long you soak or boil lima beans - they never seem to fully rehydrate properly.  When you're looking for mixed vegetables to dehydrate for additions to your meals, I highly recommend looking at the contents and shapes of the veggies in the bag.  BJ's Wholesale has great 4-lb bags that require minimal changes.  The only thing I did to these was cutting the green beans in half to make everything the same size.  When it comes to vegetables, uniform size is key to getting them dehydrated and rehydrated at the same times.  Trust me, there are few things sadder than being hungry on trail and crunching into half-rehydrated corn when the rest of your meal is ready!

Something I did for our meals a few years ago was broiling and blackening bell peppers before dehydrating.  This little something extra really made the flavors taste even more homemade despite being in the backcountry.  My most important tip is to NOT mix different veggies in your dehydrator at the same time if you can help it - especially strong-smelling veggies.  If you want to do a tray of red onions, put them in by themselves or else all your food will taste like onion!

I actually have EIGHT POUNDS of veggies in that second photo. They don't amount to much!

I actually have EIGHT POUNDS of veggies in that second photo. They don't amount to much!

Meat

Meat is a tricky, tricky thing to home dehydrate.  If you're doing beef or ground turkey you'll quickly become familiar with the term "gravel".  The reason?  Ground meat basically has the texture of gravel when you do it right.  Buying meat is the critical first step and you've got to do it right.  If you're set on using ground beef, you'll need to buy the leanest possible cut you can find (less than 90%, and 95% lean is more ideal).  Since buying meat this lean is often expensive, I chose to go with lean turkey as my meat choice.  We bought 99% lean white ground turkey.  Now, cooking the meat is also tricky because you'll have to do it low, slow, and as dry as possible.  No oils at all can be added to the pan, as every bit of oil can go rancid in packaging.  Adding dried breadcrumbs to your meat to soak up the oil is a great step you can take during the browning process.  After cooking the meat to well done, you'll need to sop up any oil that happened to cook out before breaking it up to place in your dehydrator.  Like rice, meat has a tendency to clump, so you'll need to break up the clusters every once in a while. Once your meat is completely dehydrated, I highly recommend vacuum sealing each portion to keep it fresh, just in case.  

Fruit

Like veggies, uniformity is key with fruit.  Having all your pieces roughly the same size will save you time on both ends of the dehydrating and rehydrating process.  One tricky element to dehydrating fruit, however, is browning.  Apples and bananas both tend to brown when they're exposed to oxygen for a period of time.  I solved this problem by brushing easily browning fruits with lemon juice on both sides before putting them on trays in my dehydrator.  I liked seasoning my fruit as well.  A sprinkle of ginger and cinnamon on apple slices comes out delicious!

Me with my bounty - an entire summer's worth of meals for two hungry hikers. 

Me with my bounty - an entire summer's worth of meals for two hungry hikers. 

Just like with any good recipe, mastering skills with a dehydrator will take time and a few errors will happen as well.  It's all part of the journey!  Have you experimented with dehydrating meals?  What is your favorite backcountry meal? 

Better Nutrition for Backpacking

Thru hikers of any distance trail are notorious for eating highly processed, fatty, best bang-for-your-buck calorie bombs for meals.  If you’re an ultrarunner you definitely know what this is like.  When you’re out burning thousands and thousands of calories per day and you’re supporting yourself by carrying all your own fueling options, you know that lightweight, high-calorie foods are king on trail.  While the best way to get better nutrition on trail in remote locations would be to make your own food, here are some hacks to help you get in some better nutrition during your next long-distance adventure. 

Chia Seeds: 

Chia seeds pack in some serious nutrition.  With fiber, protein, and omega fatty acids, adding a tablespoon or two to oatmeal in the morning will pack in more punch to get you moving.  You can also make your own chia energy drink at lunch time by mixing in some chia seed with your favorite electrolyte replacement.  

Protein Powder: 

I am a huge fan of adding chocolate protein powder to my cup of coffee in the morning on trail.  While I personally use whey protein, you can chose your favorite and add it to your coffee or tea before breakfast for a quick nutrition boost.  While chocolate in coffee is the most popular on trail option, you could also use vanilla or unflavored powder with coffee.  Vanilla powder with green tea or chai powder with coffee are also amazing flavor combinations. 

Nut Butter Packs: 

Peanut butter on trail doesn’t have to be cheap store brands loaded with sugar and palm oil anymore!  With more and more brands hitting the market, like Justin’s, Peanut Butter & Co., andBogg’s Trail Butter coming in single serve packets, it’s simple to get your fix on the go.  Bonus nutrition points to you if you consume a pack with a fresh apple you’ve packed out of town!

Coconut Oil:

Coconut oil comes in solid form and is super simple to add to any meal you’ll be making over your camp stove.  Another great bonus to using coconut oil is the fact that it can also be consumed by the spoonful.  Being high in saturated fat and easy to digest, this stuff is delicious to add to any Knorr Rice Side you’ll be eating for supper. 

Gummy Vitamins: 

When all else fails, you can always add some adult gummy vitamins to your food bag.  Chewing up two of these guys at the end of a long day after you’ve finished your supper on trail can help suppress that after-dinner sugar craving many hikers get after burning thousands of calories hiking.  

Choose Healthier Options in Town:

Heading into town every few days to resupply usually means eating a meal in an actual restaurant - one you won’t have to cook over your camp stove!  While images of greasy pizza and juicy burgers will dance in your head all the way down to town, adding a salad to your meal won’t hurt either.  If you absolutely must have that whole large pizza, consider getting extra veggies as toppings.  The same goes for your hamburger - ask for extra lettuce, tomato, and onions to go along with that delicious goodness!  Consider a healthier appetizer as well - hummus is always a great option that is on many menus. 

While many people joke about the thru hiker diet, it can actually be easy to work in some sneaky healthy foods.  Do you have any tips for working in some healthy fats and proteins on distance hikes? 

Red Beans and Rice - A Front Country Camping Favorite

Even though I'm a backpacking guide I still enjoy heading out for a front country campout every now and again.  The fun thing about heading out for a campout when you've got a car is the fact that you're much less limited on your food choices.  You're also able to bring a lot more friends with you to enjoy the campout as well!  Whenever I'm heading out for a front country camping event, I often find myself looking at my cast iron dutch oven for food preparation.  It can be used to make tons of dishes from savory stews to monkey bread to even fresh batches of biscuits!  My favorite recipe to make for a crowd though is my famous red beans and rice.  This make-ahead meal can be prepped in the days leading up to the event and then reheated on your grill or campfire when you get there.  

If you've read any of my recipes before you know that I don't take shortcuts when it comes to using more natural ingredients.  Many of you may remember that when I was prepping for my thru hikes last summer I even made my own chicken stock to use to cook the rice.  When making this recipe I decided I wanted it to be a little healthier, even though I was going to be out camping.  I started with dry beans soaked at home overnight for less sodium.  I also chose al fresco's Sweet & Smokey BBQ Chicken Sausage.  It's made with lean, skinless chicken meat, al fresco’s chicken sausage products contain 70% less fat and 30% less sodium than average pork sausage. Better yet, all of al fresco’s chicken sausage flavors are gluten-free and are packaged fully cooked.  This meant all I needed to do was brown the sausage and I was ready to get cooking!  Here's my recipe for red beans and rice to feed a crowd: 

image.jpg

Sprinkles' Red Beans and Rice: Cook time - 3 hours, plus reheating time at camp

Ingredients: 
1 Package al fresco Sweet & Smokey BBQ sausage
1 1 lb bag dry red beans (soaked overnight)
1 sweet onion, diced
1 red bell pepper, diced
2 stalks celery, chopped
1 clove elephant garlic (or enough to equal 2 tablespoons)
3 dried bay leaves
1/2 Tablespoon ham base seasoning
1 tablespoon cajun seasoning
1 tablespoon Louisiana Hot Sauce
Salt & Pepper to taste

For Serving: 
1 cup brown rice, cooked in 2.5 cups water
Green onion for garnish

Browning nicely! 

Browning nicely! 

Veggies are so pretty! 

Veggies are so pretty! 

Put your dutch oven over medium high heat and add sliced up al fresco Sweet & Smokey BBQ Sausage, browning it to your liking (I like mine nice and crunchy!).  Remove from the pan and set aside to add later.  While the sausage is browning, chop up all your veggies including the garlic.  Add them to a bowl, along with the ham base, cajun seasoning, and bay leaves.  After removing the sausage from the dutch oven, add this bowl into the pot.  Cook until the veggies have softened - about 5 minutes.  Add in your drained and rinsed red beans and stir.  Now, cover the mixture with enough water to keep everything covered about three inches.  Place the lid on the pot with a slight gap to allow for evaporation and simmer for about 90 minutes - stirring every 15 minutes or so.  After 90 minutes, add the sausage back to the pot along with the hot sauce and let this cook down with the lid on, but slightly ajar, for another 30 minutes or so.  Continue to check this every few minutes to make sure it's breaking down properly.  When you're adding the sausage back to the pot, this is when you're going to want to start the rice if you're going to be eating this right away.  After about 30 minutes the bean mixture in the dutch oven should thicken up like gravy.  Before serving, check the salt and pepper seasonings and add more to your liking.  Serve over brown rice with green onions on top, along with salt, pepper, and extra hot sauce!

Yum! Dinner is served! 

Yum! Dinner is served! 

Al fresco also has a Summer Grilling Sweepstakes going on RIGHT NOW that you can check out by clicking the link: http://www.alfrescoallnatural.com/promos/summer-grilling-sweeps .  All you have to do is vote for your favorite recipe and you'll be entered for a chance to win $500 and a new grill (valued at $500)!

Disclaimer: This post was sponsored by al fresco and TapInfluence through FitFluential.  As always, all opinions are my own. 

This is a sponsored conversation written by me on behalf of al fresco. The opinions and text are all mine.

Fuel 100 Electro-Bites: A Food Review


Update: Use code SPRINKLES at checkout for 25% off your order (not an affiliate link, feel free to share!) 

With the heat of summer in full swing I've been constantly attempting, and sometimes losing, a battle with my electrolyte balance.  Between my work outdoors as a full time hiking guide and helping my boyfriend train for his first half marathon, I've been spending a lot of time in the low elevations of East Tennessee - often times in sweltering heat and humidity with heat indexes in the high 90s and low 100s.  When I was offered the opportunity to try out Fuel 100 Electro-Bites I jumped at the chance to try something new.  Here are my thoughts on this product. 

After doing some research regarding Fuel 100 Electro-Bites I was excited to try them out for two reasons - the first being that they weren't fruit chews and the second being that they weren't sickly sweet.  While this product comes in five flavors, only three of them are flavors that sound sweet: pumpkin spice, apple cinnamon, and salty vanilla.  The other two flavors are simply salty and salty vinegar.  This immediately appealed to me because of recent I've been all sugared out and I've been on a quest for savory fueling options that are also easy to eat on the trails or on a run.  These tiny bites fit the bill!  The other thing that appealed to me was the fact these were a dry, baked product.  No sticky gels, chews, or sweet drink mixes.  Don't get me wrong, I love a sweet electrolyte tab after a hot and long run, but getting the chance to try something different was definitely a plus!

I took these out on a training run on a night when the heat index at sunset was 94 degrees.  Even though I ran an easy 3.5 miles I knew I had sweat more than I did on 10 mile runs back in the winter time.  If I don't replace electrolytes immediately I usually get dull and throbbing headaches so being able to grab them and go was a big plus for me.  I ripped the tab off the bag of the apple cinnamon bites and dug in!  The first thing I noticed was the fact that even though these bites were dry, they didn't make my mouth feel dry.  The crunchy little bites were actually fun to chew and were easy to swallow despite being hot and sweaty.  I was able to follow the bites by drinking down some cold water and felt great.  The apple cinnamon flavor was very mild and the hint of coconut oil was delicious as well. 

Easy to refuel after a long, hot run! 

Easy to refuel after a long, hot run! 

I also brought along the salty vinegar flavor on a longer day hike during a humid and hot June afternoon.  The vinegar flavor wasn't overpowering and again the coconut oil was very mild and present as well.  These bites stored well in a pack and since they're baked they don't melt the way an electrolyte chew would.  You also don't have to worry about adding a tab to water and waiting for it to mix before drinking.  All you have to do is rip the top off and start snacking!

I've got my fuel for after the hike! 

I've got my fuel for after the hike! 

Personally, I loved these little electro-bites and would definitely buy them again.  The fact that they're so much different from anything I've tried recently really sold me on this tasty and quick fuel for athletes.  They're formulated for distance athletes and have 100 calories per pack, including 190mg of Sodium, 55mg of Potassium and 46mg of Magnesium. Fuel 100 Electro-Bites will have a place in my pack for the rest of the season for sure!

A handful of baked electro bites - yum! 

A handful of baked electro bites - yum! 

Have you tried any new electrolyte replacement products recently?  What's your favorite way to refuel during a hot and humid summer run or hike?

Disclosure of Material Connection: I received Fuel 100 Electro-Bites for free from Fuel 100 as coordinated by Outdoor PR in consideration for review publication.  All opinions, as always on this blog, are my own.

My Five Favorite Trail Lunches

Recently I started growing tired of my usual PB&J on flatbread or a ProBar for a trail lunch and began looking for something more creative.  When I was online looking for ideas something simple came to me and I couldn't believe I hadn't thought about it before - dehydrating something simple and savory for lunch!  While so much of the food backpackers can find in the stores for lunch is sweet, like a trail mix, granola bar, or Poptarts, I realized that if I did my own dehydrator meals for lunches I could get some more savory foods into my backpacking diet.  Here is a rundown of some of my favorite food to eat for lunch. 

1) Hummus and crackers with veggies - Dehydrating hummus was such a simple idea I couldn't believe why I hadn't thought of it before.  Simply spread your hummus on a fruit leather tray (or piece of parchment paper in an oven or on a regular dehydrator tray) and dry overnight.  On my Excalibur dehydrator I went to the 125-degree setting for 12 hours.  In the morning the hummus should be very powdery and easily crumble.  One container of hummus (10 ounces) should make four servings for those of us who backpack on shorter easier trips.  If you're doing mega miles one container should get you two servings.  Rehydrating is simple and quick - use cold water to cover the hummus powder by 1 inch and squish the bag around for 5-10 minutes.  I usually eat mine with Good Thins crackers and whatever fresh veggies I want to pack out.  I've packed out carrots, celery, and radishes with good results even in the summer.  

2) Dehydrator burritos - Mixing a can of refried beans with a can of enchilada sauce in a large bowl and then spreading thin on dehydrator fruit leather sheets (or parchment paper for those without the sheets) can create a delicious burrito filling for the trail.  Simple dehydrate overnight at 125 degrees and in the morning you'll have a crumbly, powdery bean burrito filling! Rehydrate in a freezer bag for 10-30 minutes with cold or hot water.  Spoon into your tortilla and put salsa on top and you'll have a filling lunch!

3) Pepperoni and Laughing Cow Cheese sandwich - Carrying pepperoni and Laughing Cow cheese are usually a staple on a long trip.  Laughing Cow comes in several flavor varieties and you can use a bagel thin or a sandwich thin for the bread.  Switching up the flavors of cheese and bread every so often turns this trail staple into something different!  Laughing Cow cheese is generally like shelf-stable cream cheese.  I've had some in my pack for up to 5 days in the summer and it's still holding it's shape.  

4) Flavored Couscous - Near East brand makes some wonderful couscous flavors.  While I normally eat the entire box for a hiking dinner, a half portion works great for lunch for me!  Before hitting the trail, split the box evenly between two freezer bags.  Make sure to shake the box well before splitting if the spices are already mixed in with the couscous.  If you are making your own flavored blend at home, I find the 1/4 cup serving of dry couscous works well for lunch.  If it's a cooler backpacking trip you can heat up some water, but most of the time I just add cold water and let it soak for at least 15 minutes before I eat it.  Cold hydrating works very well for couscous!

5) Flavored Tuna and Flatbread - There are now several flavors of tuna on the market, including a few in olive oil instead of water.  Right now I'm loving the Mediterranean Style Sunkist tuna on a sandwich thin, but with all the flavors of tuna and salmon on the market right now it makes it easy to have a different flavor every day of the trip!

These are just a few of my favorite savory backpacking lunches.  Do you prefer savory or sweet foods on trail?  What is your favorite lunch?

I'm linking up with CourtneyCynthia and Mar and some of the other folks who link up with us – and please don’t forget to link to your hosts if you are participating!

Hiker Mocha - An Easy, Popular Breakfast for Long-Distance Hikers

This shop has been compensated by CollectiveBias, Inc. on behalf of its advertiser, EAS Sports Nutrition.  #easbrand #PowerinProtein #collectivebias #ad 

Whenever I'm out on trail, be it as a guide or someone out on my own personal backpacking trip, food is the number one thing hikers will chat about while in camp at night and in the morning.  Whenever you see another hiker eating or drinking something it's common practice to chat about it and why they're consuming it.  I hadn't been on trail for more than a week before I started noticing all the hikers drinking a breakfast concoction I had never seen before.  While the drink had many names and variations (hiker mocha, ranger pudding, power breakfast...) my personal favorite was the Hiker Mocha.  Who doesn't love a fancy coffee drink at the beginning of a long morning of hiking?!  

At first my Hiker Mocha was chocolate milk powder and instant coffee, but I quickly realized that sugar energy was just burning off quick and made my teeth hurt.  I took a cue from those making the ranger pudding and switched to a chocolate protein powder.  Switching to a protein powder, however, wasn't an easy task!  Not all proteins are created equally.  Some powders contained added sugars or the dreaded sugar alcohols (REALLY harsh on the stomach after a few hours).  Some were kind of vague with wording like "proprietary blend", which I later found out means the ingredients aren't really disclosed and mixes of different ingredients are used.  While hikers eat lots of sugars and processed foods, it's nice to get a break from stuff like that at least once a day!  

When we were at the hiker mecca known as Walmart we could find EAS 100% Whey Protein powder.  I personally found Whey Protein easier to digest and it was much easier on my stomach than other brands with added sugars, which is why I chose this brand.  I was also excited to learn you can purchase this powder online as well!  This came in really handy for me when I was hiking near smaller towns where it was really difficult to find any types supplements on trail.  In fact, buying this powder online is still my favorite way to do it!

A Hiker Mocha is so great at breakfast because you can drink it hot or cold, which really comes in handy on those mornings when you don't want to have a hot coffee.  Here are the easy-to-follow instructions for making your very own Hiker Mocha!

With only three simple ingredients you have a yummy, protein-filled breakfast drink!

With only three simple ingredients you have a yummy, protein-filled breakfast drink!

Ingredients: 
-2 scoops EAS 100% Whey Protein Powder (chocolate)
-1 Tablespoon Instant Coffee or one packet of instant coffee/espresso
-1 Tablespoon Powdered Coconut Milk
-Optional honey to taste

On Trail Prep:
In your cup, measure out the first three powdered ingredients and mix together.  Add in a few tablespoons of water to make a slurry.  This will help equally distribute the ingredients and prevent any type of clumping of the milk powder.  Slowly add 8-10 ounces of water, hot or cold, to your cup. Add honey or sweetener of choice if desired. Stir well and enjoy!

The three powdered ingredients together - super simple!

The three powdered ingredients together - super simple!

Alternatively, you can also make this mix in a Nalgene or similar bottle by adding the powdered ingredients and all the water with the optional sweetener at the same time.  Shake well until ingredients are well-combined and the drink is smooth.  Enjoy while sitting in camp or on the go to get in those morning miles!

Easy to mix at home and drink on the go! 

Easy to mix at home and drink on the go! 

I found that I not only felt better with protein in my system on trail, I also was able to hike stronger in the mornings without those nasty sugar crashes that tend to come on around mid-morning.  Getting my energy from breakfast containing 30 grams of protein worked well for me!  Have you ever tried drinking a protein drink either on trail or before a long hike? Tell me what you think about adding a supplement to your diet during physical activity.  Leave me a comment below!

Check out the New NBC Show S.T.R.O.N.G where EAS® products will be featured on the June 2nd episode. (9pm EST 8pm CST). 


What Do Thru Hikers Eat?!

Whenever I'm out on the trail, whether it's a short trip for work or a month long hike (or even longer!) people who have never done a backpacking trip often ask me how I eat on the trail when I'm staying in the woods.  I usually give them the short answer of "I carry food!" because many people just assume I forage or hunt or even carry tons of canned goods (yes, really!). Since I've been doing a lot of advice posts recently, this post is aimed at newer backpackers who are still confused as to what to bring to eat for longer distance hikes.  While there are so many wonderful options out there, here are the most common things people carry on thru hikes.  It should be noted that I dehydrated all our food from recipes for our hikes last summer, so more intensive backpacking "recipes" won't be covered here - stay tuned for future posts for people looking for recipe inspiration (as well as healthier options)!

Breakfast Ideas

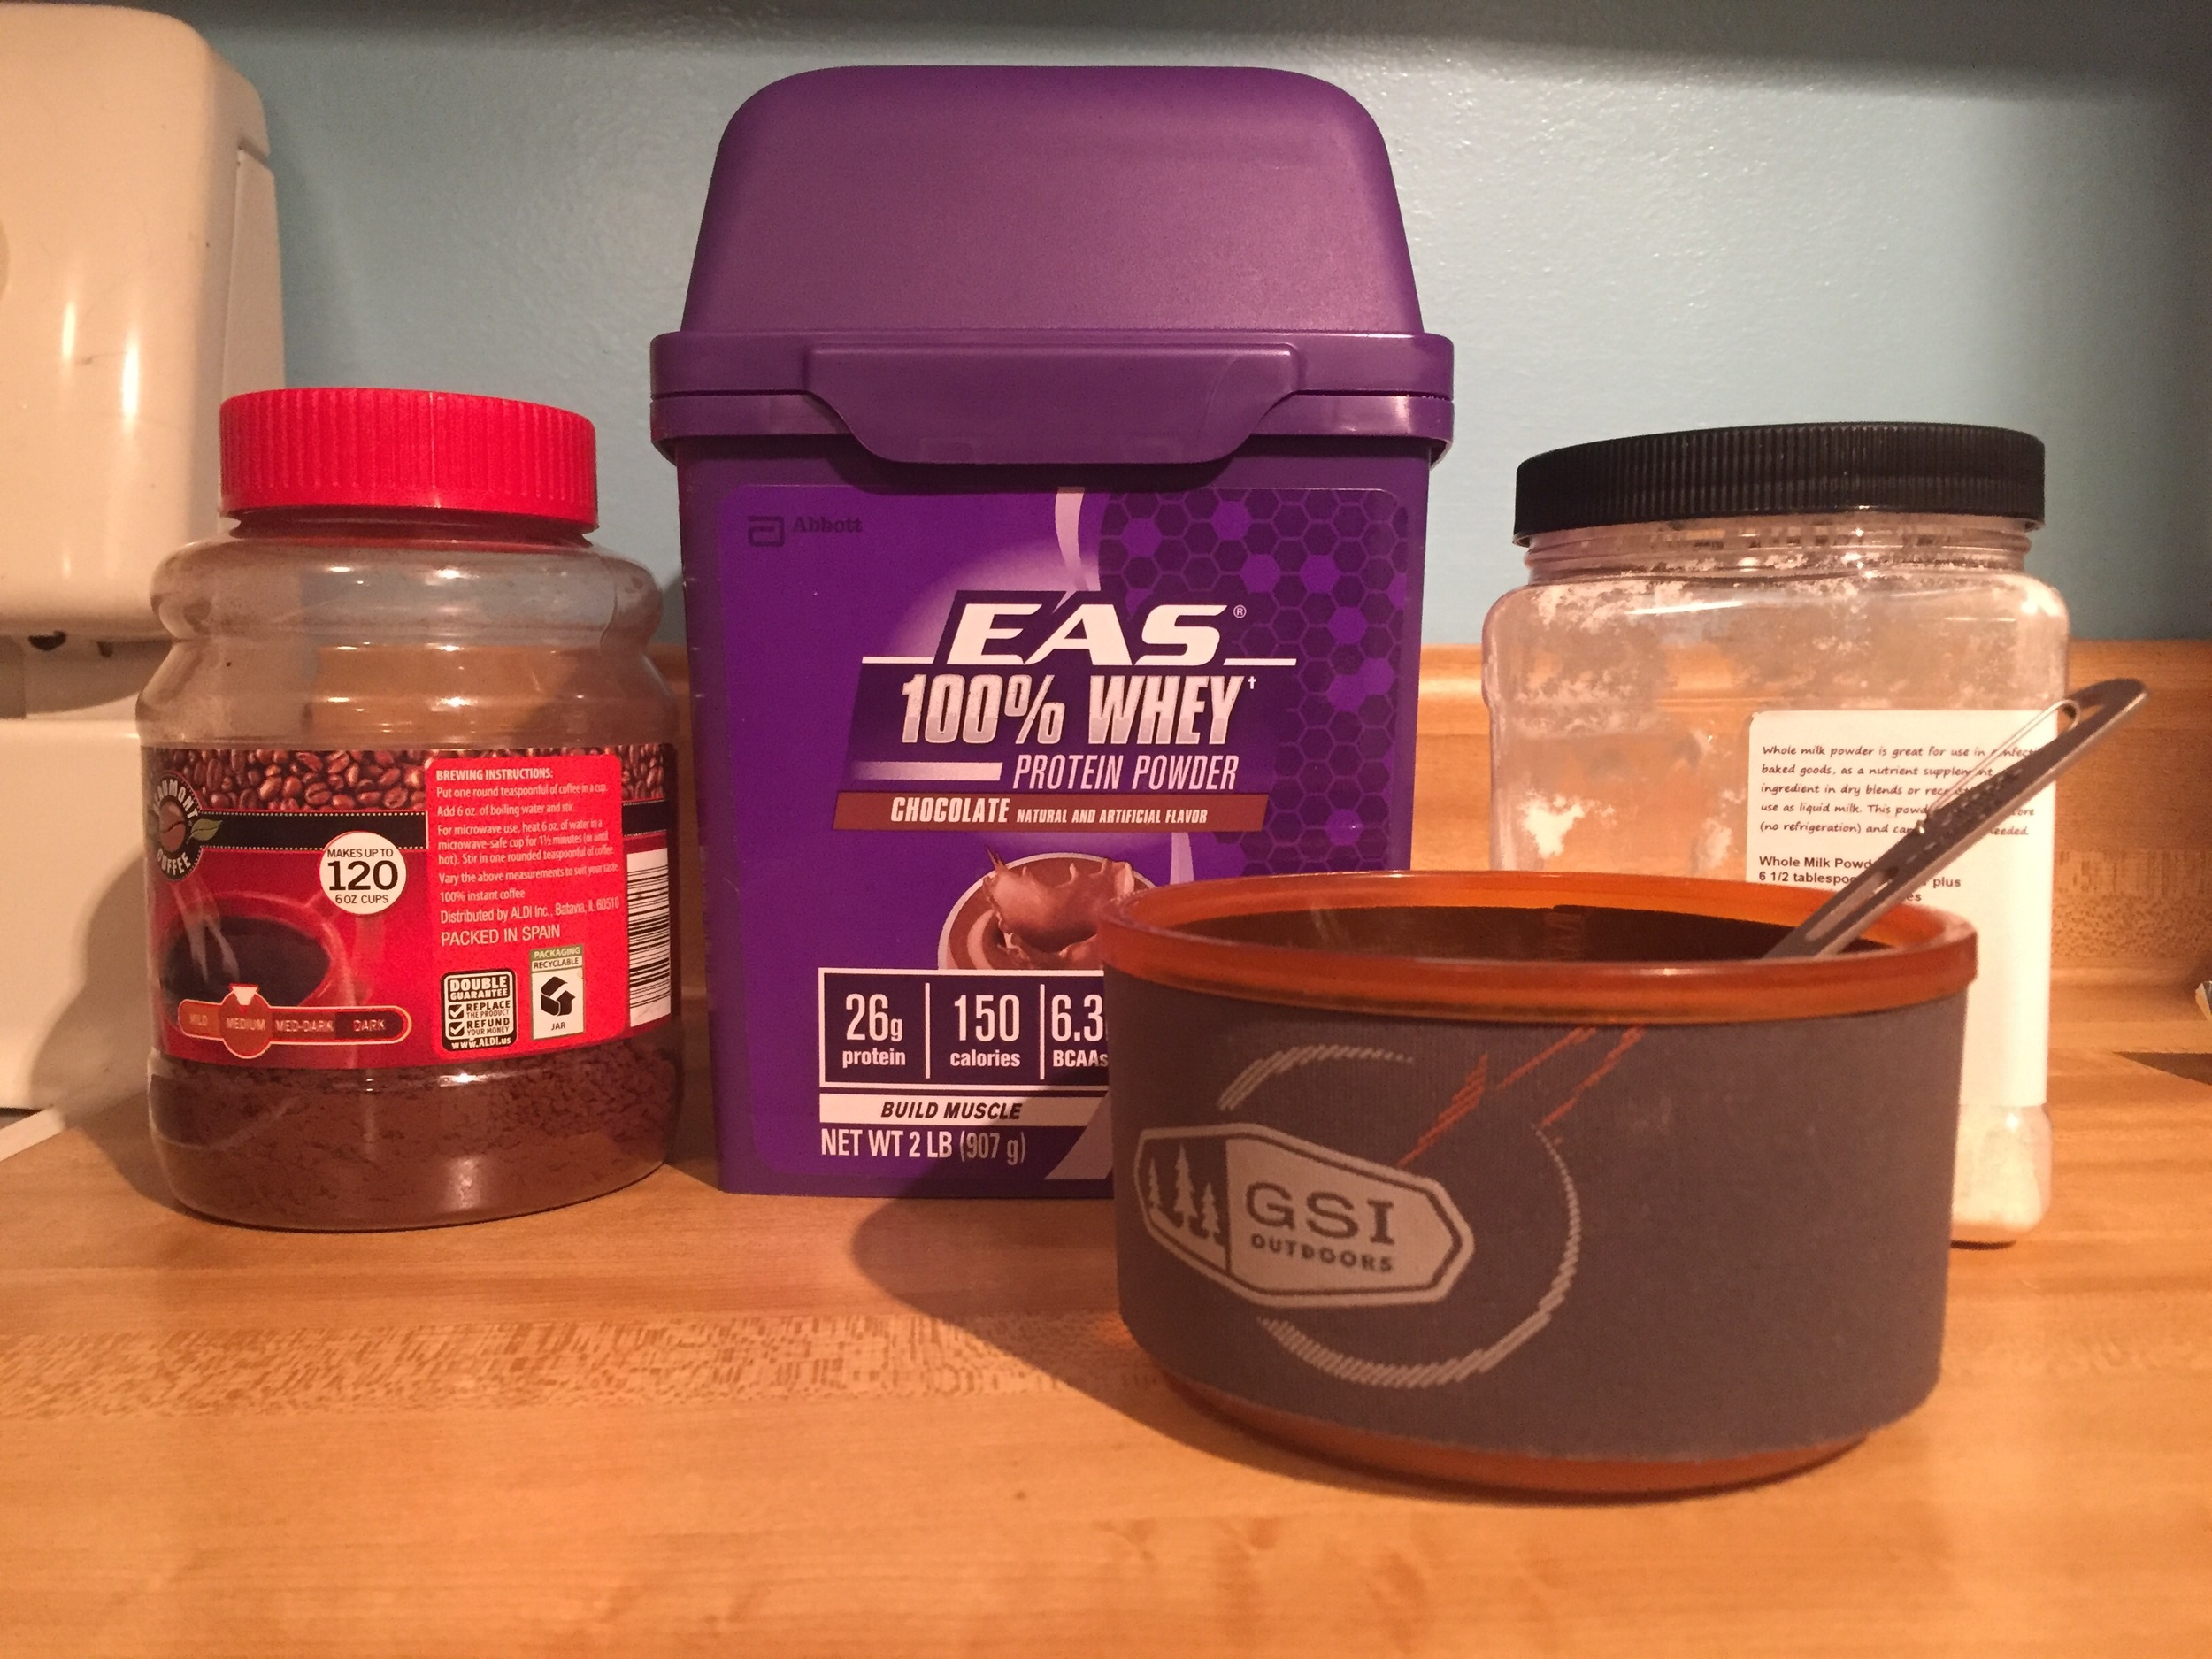
Breakfast is a toughie because some people just don’t like breakfast.  If I don’t eat breakfast I crash and burn fairly quickly.  I also was never a coffee drinker until I hit the trail but once I really got into the routine, I found a warm cup of coffee was perfect for me most mornings. On hot summer mornings I often just made it with cold water for an "iced coffee"!  If you don’t think you’d like coffee, any warm liquid is often nice in the morning to get everything in your digestive tract “moving.”  Instead of hot chocolate, I really recommend Carnation Instant Breakfast packets.  They have a coffee flavor and two different chocolate flavors, as well as vanilla and strawberry.  There is at least SOME nutrition in this, as well as a LOT sugar to perk you up. My personal favorite for a breakfast drink is coffee with a pack of Carnation.  It’s like a hiker trash mocha, haha!  

-Two packets of instant oatmeal - two will at least give you calories. Interestingly enough if you look at a pack of instant oats you'll see something you probably never noticed before - a fill line. That's right, you can eat this stuff right out of the packs for easy clean up!  Just be careful with super hot water.  I often ate it cold on trail. 

-Two packets of instant grits or cream of wheat

-ProBars (340 calories - whole food energy)

-Little Debbie Cakes (sugar energy)

-Honey Buns (iced honey buns have the most caloric bang for your buck, often packing in close to 600 calories for only a few ounces of weight)

-Pop tarts

-Bagels with shelf-stable cheese (Laughing Cow will last up to 5 days in a pack) or peanut butter, cookie butter, or Nutella

-Peanut butter and granola bars (Nature Valley type)

Lunch Ideas:

I am a fan of stopping for a proper lunch.  I like to take breaks when I hike and I find a proper lunch break makes me feel better in the afternoon.  Lunch ideas are often the same as breakfast with a few tweaks. 

-Peanut butter and honey on a tortilla or the sandwich thin bread or bagels (I hate tortillas, so I opt for bread)

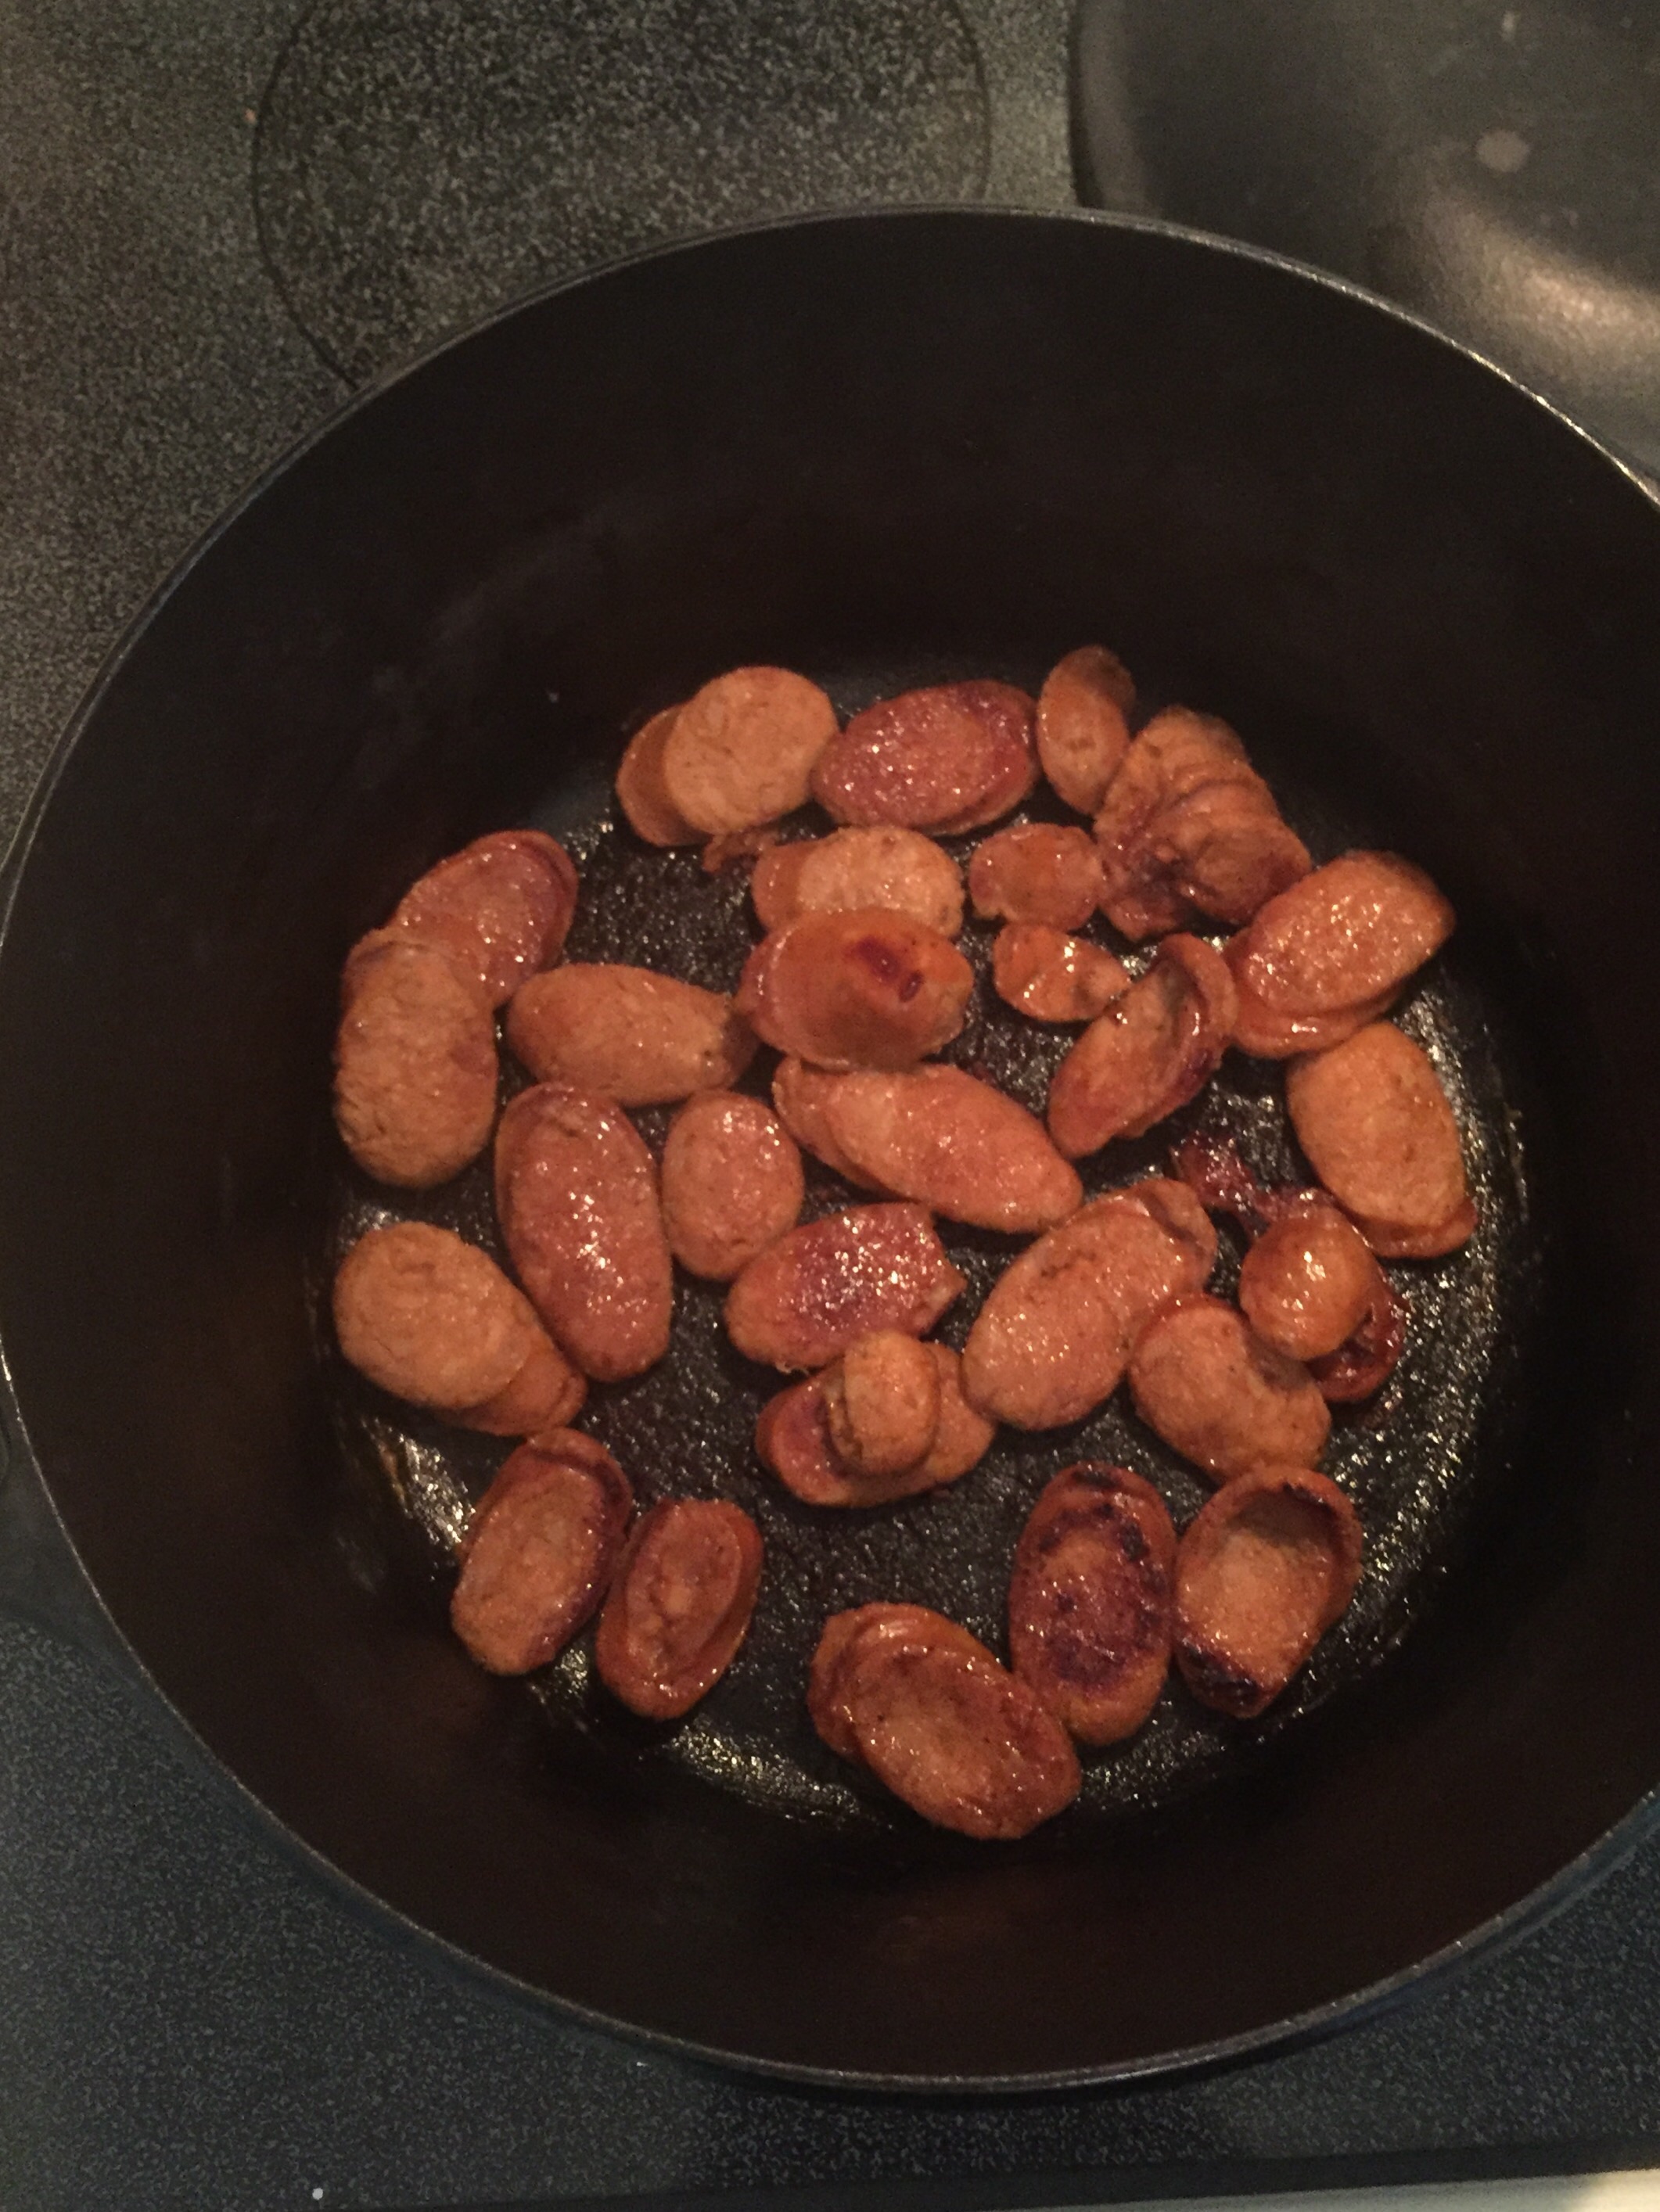
-Pepperoni/summer sausage and Laughing Cow Cheese (or regular cheese) on a bagel or bagel thin

-Pop tarts with peanut butter, eaten like a sandwich

-Tuna or salmon packets with tortillas or sandwich thins. I don't know if any of you have noticed, but they make so many flavors of tuna now and I even recently saw two different flavors of salmon!  Spam packets also are popular for lunches.

Dinner Ideas:

Dinner ideas can be crazy versatile.  There is really more food out there than you’d think, but if you don’t shop for processed food often it’s hard to figure this out.  Sometimes you just have to be creative and do without things and be good at improvising.  The only thing I recommend staying away from for trail dinners is quinoa - it takes 18 minutes to make and that’s active cooking time.  Fuel canisters can only last 60-75 minutes, so it burns up a lot of fuel on your stove!

-Near East CousCous (There are a TON of flavors and its fast!)

-Ramen - you can add peanut butter and dried veggies for a “pad thai”

-Mac and Cheese - even without butter and milk powder this works well!

-Knorr pasta sides or rice sides - these generally cook in 8-10 minutes, but can be done in as few as five active with 10 extra for sitting and soaking

-Instant mashed potatoes - they come in several different flavors

-Stovetop stuffing - surprisingly filling for a dinner or you can mix them with potatoes 

-El Paso Ready Rice - there are tons of precooked rice packs out there in lots of flavors. Unfortunately, these are heavy, but are great for a first day out of town

-Asia Kitchen makes Chinese food that is much like the ready rice - just heat for a few minutes and serve

-Taste of India makes Indian dishes that are heat and serve (and these make other hikers REALLY jealous when they smell them!)

Snacks: 

I usually eat three meals a day and two snacks when I am hiking. I have breakfast around 7:30 a.m., a snack at 10 a.m., lunch around 12-1 p.m., a snack around 4 p.m., and dinner at camp.  This is my magic recipe for not feeling “hangry” during the day!

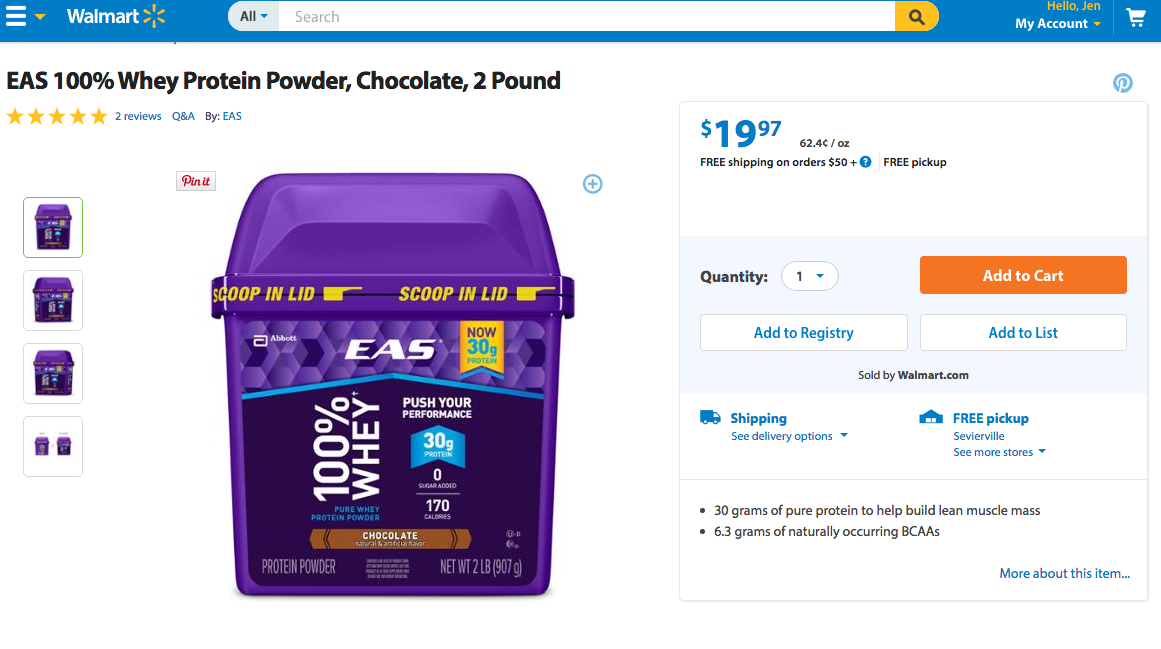
-Nature Valley Granola Bars, Clif Bars, Kind Bars - any kind of bar really!  I would AVOID anything labeled as a protein bar or body builder bar.  These bars have sugar alcohols as an ingredient and sugar alcohols are notorious for making you need to poop VERY badly. I made this mistake a few times on trail and it’s HORRIFYING. 

-Goldfish Crackers, Cheeze Its, Triscuits - most crackers like this hold up for a few days pretty well

-Fruit snacks

-Trail mix - can be heavy as most bags are an entire pound, but if you make a good dent in it each day it should be okay

-Cheesy Popcorn - holds up surprisingly well in a gallon sized freezer bag and is a personal favorite of mine

and of course, CANDY!  The mini candy bars are what I always went for. The packs of 8-10 are the best because it’s just enough of a snack, plus you can usually eat two per day. Sometimes I would have one with lunch and one with dinner as a dessert. 

I should also note that for people who don't often eat a lot of processed food products, it can be really hard on your stomach and body to immediately begin consuming large amounts of this stuff.  For me, by the time I got to Hot Springs, I constantly felt kind of queasy.  I picked up a package of Flintstones Chewable kids vitamins and took two of them every night before I brushed my teeth and they really helped me feel better.  Several others who noticed me doing this also reported good results.  Since then, they've come out with adult gummy multivitamins and NoKey does really well chewing those up every night.  I personally cannot take regular adult multivitamins because I get stomachaches from the iron content.  So, in short, if you start feeling run down and crappy fairly early on, consider adding a multivitamin to your diet!

And yes, I know I may have forgotten (insert whatever it is you think I forgot here).  There are so many different food choices out there and so many different dietary needs. Some people prefer to not even carry a backpacking stove, so this article doesn't even begin to touch on all of those things!  I'm just covering the bases for any new or wanna-be hikers who are looking for ideas that are cheaper than Mountain House type meals and will be cooking. 

Well, there you have it!  A quick and dirty list of foods I commonly see on the trail that long-distance hikers are eating.  Are you horrified at what thru hikers consume?! What do you normally eat on the trail? Are there any foods you love or foods that you can't even bear to look at after eating them so often on a hike? I'd love to hear your favorites! Leave me a comment below or find me on Facebook or Twitter to get the conversation started!

Paleo to Go Meals Review - From Appalachian Trials

Recently I was given the opportunity to taste test Paleo Meals To Go. A small mother and son company out of Colorado, this company embraces what it means to eat well in the woods.  Check out my review over on Appalachian Trials right now by clicking the link below!

Recipe: Hiker Crack Cookies

It's near the end of the hiking season and you're out on a backpacking trip.  Your stomach is growling and you know it's time for second breakfast, but all the foods you've been eating since springtime just don't sound appealing anymore.  Hungrily, you'll stuff a protein bar in your face while you walk and struggle to swallow.  Sound familiar?  All hikers tend to get tired of the same flavors of bars season after season, but I'm here to help!  My recipe for Hiker Crack Cookies will help get you through the rest of your season and are actually pretty good for you too!

These cookies are delicious all on their own, but on the trail I do step it up one more notch and add a filling.  When peanut butter or any other butter of your choosing (cookie butter, anyone?!) is added they make amazing sandwich cookies!  When I'm at home I dip them into yogurt or slather them with coconut butter as icing - even fruit spread is great on them.  Eat just one cookie and you'll see why we started calling them Hiker Crack!

A plate of deliciousness! 

A plate of deliciousness! 

Hiker Crack Cookies (makes 4-5 dozen)  //   350 degrees for 10-12 minutes

Ingredients:
3 room temperature eggs
1 stick (1/2 cup) room temperature butter
3/4 cup white sugar
3/4 cup lightly packed brown sugar
1 cup nut butter (I've used all combinations of almond, cashew, peanut butter, and even Nutzo!
                             You just need it to equal one cup total)
1 teaspoon vanilla
2 teaspoons baking soda
1/2 teaspoon kosher salt
1/4 cup hemp seed (you can also use pumpkin, sunflower, or sesame seeds!)
1/4 cup chia seed
1/2 cup chocolate chips (I prefer the minis - you can get more in there!)
1/2 cup of currants/cranberries/raisins/blueberries - your choice!  Mixing is fun here too!
1/2 cup unsweetened coconut
1/2 cup of almond flour or oat flour* 
3 cups rolled oats

Instructions:
1) Cream together the butter and both sugars until smooth and pale in color.  Slowly add in the eggs one at a time until mixed.  Add in your nut butter mixture until smooth, followed by your vanilla.  Scrape down the bowl.  Finally, add in the salt and baking soda and mix until smooth. 
2) While the mixer is going, put your hemp seed, chia seed, chocolate chips, dried fruit, coconut, almond/oat flour, and rolled oats in a mixing bowl and stir with a fork to evenly combine ingredients. 
3) Slowly add the dry into the wet ingredients until just combined.  
4) Refrigerate the dough for at least an hour - this is crucial or else your cookies will spread out and be very runny in the oven!
5) Preheat the oven to 350.  Using a tablespoon, drop the cookies onto the sheets and space them at least an inch apart.  
6) Bake for 10-12 minutes.  When they are just starting to turn golden brown on top, pull them out of the oven.  In my oven the bottom rack heats faster and I make sure to rotate my trays halfway through cooking.  Your oven may vary, so watch them closely on the first batch!
7) Let the cookies cool slightly before moving them to cooling racks. 

*Oat flour is simple to make at home if you don't have almond flour!  All you need to do is take 1 cup of rolled oats and throw them into a blender or a Magic Bullet.  I find that 1 cup of oats is pretty close to 1 cup of oat flour and makes a great substitute in recipes. 

Do you have any go-to recipes for day hiking or a backpacking trip that don't involve your typical trail foods?  I'd love to hear about them.  Leave me a comment below or join the conversation over on Facebook!

One Summer, Two Hikers, Three Trails, and Not a Single Lipton Side in Sight!

An entire summer worth of food stretched out all over our spare bedroom!  Everything we will be consuming on our three hikes is here. 

An entire summer worth of food stretched out all over our spare bedroom!  Everything we will be consuming on our three hikes is here. 

I've finished!  A week ahead of schedule I have all of our food dehydrated, packaged, and ready to mail out to a friendly post office near the trail somewhere in the eastern portion of the US.  Thanks to a friendly hiker on Instagram I have also learned that Priority Mail Regional boxes will save me a FORTUNE!  Seriously, go to the USPS website and order your own regional boxes.  They're bigger and, for the BMT if we mail them from my parents house, we're going to save SEVEN BUCKS a box!

So, here's the breakdown of what I've made meal-wise for the summer:
Breakfasts: Sweet potato pudding, rice pudding, pizza grits, breakfast couscous, assorted Poptarts.  I also made a special breakfast drink out of Carnation Instant Breakfast, powdered coconut milk, and instant coffee.
Lunches: Refried bean burritos with salsa, dal with tortillas, sandwich thins with peanut butter/cashew butter or tuna, Poptarts
Dinners: Dal with rice, Hawaiian-style ham and pineapple rice, "soul food" with brown rice and blackeyed peas, mushroom stroganoff with egg noodles, mac & cheese, sloppy joes, Thai-style ramen. 
Snacks: Picky Bars, candy bars, trail mixes, dehydrated apple chips

We'll have enough dinners to get through the trail and we'll need to supplement still with the tuna packets and the peanut butters.  I don't have either of those meals planned for the BMT though, so the shopping for the tuna can wait until we're back in NY for the Finger Lakes Trail. I'm hoping that our portion sizes for the meals we've chosen work out alright.  The hardest part of planning all this cooking has definitely been the fact that the meal sizes all seemed to vary SO MUCH!  One recipe I made, the dal, called for serving 3 people.  I ended up getting 14 servings out of it with the measurements provided in the recipe!  I ended up with more dinners and less lunches due to these sorts of discrepancies, but hikers are great at adapting and if we end up having to cook lunches - so be it!

I had a few people ask me how expensive it was to do all these meals so here's the price breakdown:  I had budgeted approximately $400 for food and shipping and I'm happy to say that after we ship everything I will be under $400 for the entire summer.  That's for TWO people plus shipping!  For an average AT resupply, I was typically spending $25 to $30 per stop on just myself.  So, if we say that NoKey and I were spending $30 per person on our summer hikes, we'd be spending approximately $480 on food.  This, of course, assumes we'd be able to even get to a decent store on these trails!  The BMT goes through smaller towns than the AT - smaller towns which also see less hiking traffic than the AT and aren't quite resupply friendly.  Most of our options are tiny stores or convenience stores.  Those types of stores don't often carry much and are often insanely expensive.  Since I've done our food, I know we'll have the nutrition we're looking for, as well as the variety to keep us from getting sick of everything we're eating.  I know the Long Trail will have better resupply options on the southern portion so when the lunch/breakfast situations starts to look slim, we can supplement for a regular town resupply for breakfast items.  

I hope you've enjoyed seeing all the food prep I did over the past few weeks.  I'm very excited to get out and get hiking and can't wait to share the journey with you guys.  Happy Trails!

Sloppy Joe's - a tale of a hiker's quest

When you're hiking for a day, a weekend, or even for a month there is one thing every conversation will inevitably turn to - FOOD!  Usually more than once a day we would find ourselves hit with a hardcore craving for food, usually something so impossible to access in the small town resupply stores that the idea of it was absurd.  For NoKey and I in 2012, our food porn was all about Sloppy Joe's.  When we were hiking in Damascus, VA, we did what is called a slackpack.  This is where you leave the majority of your gear in town and take only water and food for the day.  Someone will drop you off and you walk back to your gear.  You can hike out of town, but still come back to town that night.  We did an 18-mile slackpack in 5 hours that day and we hiked back into town, starving of course.  We went to a place in town called Dairy King. The special that evening was Sloppy Joe's with tater tots.  We thought about getting them, but instead we grabbed a burger and a milkshake (blueberry and chocolate peanut butter, respectively) and vowed to go back to Dairy King before we left town the next day for what would undoubtedly be the best meal ever - Sloppy Joe's.  When we left town the next day we discovered it was Sunday.  Sunday's are the WORST DAYS on the AT because it often means all these small businesses are closed.  We fought back tears knowing we had missed our chance for Sloppy Joe's and we talked about them every night for two weeks. 

When we got just south of Waynesboro, VA we had to stop at Dutch Haus, a bed and breakfast/hostel where they would cook lunches and dinners for hikers.  I had the norovirus, meaning I was essentially quarantined in the basement.  It was on this day when I could eat nothing, nor hold it down, that NoKey got not only his two Sloppy Joe's, but also both of mine since I had paid for lunch but could not eat it.  Again, I had missed my chance for Sloppy Joe's.  It was heartbreaking in the mind of a hungry hiker.  The next 1600 miles consisted of the both of us talking about Sloppy Joe's.  We never got them again.  

This story, however, is about to get an incredibly happy ending!  In developing our hiker meals for the summer I came across an article on Chef Glenn's website describing how you can dehydrate your own ground meat.  I had an epiphany: I could make Sloppy Joe's.  We could eat them SEVEN times a piece over the course of the summer!  The food porn that kept us going on our AT thru hike could now become a reality!  While it doesn't look very pretty in the bags, it's going to be incredibly tasty in our stomachs this summer! (Scroll down for recipe!)

It's not pretty, but it will be tasty!

It's not pretty, but it will be tasty!

The first thing this recipe is going to require is that you cook and dehydrate your meat.  I chose a 93/7 Ground Turkey as fat is a big "no-no" when you're trying to preserve items.  I did 1/2 cup of breadcrumbs mixed with 1 pound of turkey meat before I cooked it.  This helped absorb any remaining fat and kept the meat incredibly dry for the cooking process.  While this isn't really ideal for most conditions, for dehydrating it is a must!  I dehydrated the meat at 145 degrees for 7 hours before it was completely dry.  

For the sauce, you can just use your favorite canned brand or you can make your own.  To dehydrate sauce, spread it in a thin layer over a silicone sheet or a piece of parchment paper on your dehydrator tray.  This dehydrates at 135 degrees for 8-10 hours.  After six hours your sauce should be dry around the edges and gelatinous in the middle.  You will take the sheet it's on, flip it upside down, and peel it off like a fruit roll up, placing directly onto the dehydrator tray.  Let it dry until it's crisp. When it's dry, break it up into smaller pieces and put it in an airtight container until you're ready to package your Sloppy Joe's!

Sloppy Joe "roll ups."  These might be good all on their own!

Sloppy Joe "roll ups."  These might be good all on their own!

Sprinkles' Sloppy Sammiches - 2 servings
-1 lb dehydrated meat of your choice (using the information above)
-1 can dehydrated Sloppy Joe sauce OR 1 recipe worth of homemade sauce
-2 tsp dried onion flake
-1/2 tsp paprika
-1/2 tsp garlic powder
At home prep: 
+In two vacuum sealer bags, split the meat and the sauce leather evenly into two portions. Add 1 tsp dried onion flake, 1/4 tsp paprika, and 1/4 tsp garlic powder to each bag.  Seal them with the vacuum sealer.  (This step is important with dried meat to keep it from spoiling!  If not using within 1 month, keep it in the fridge). 
Trail Prep:
+Pour the contents of the vacuum sealed bag in your pot and pour over just enough water to coat the contents.  Heat the contents to a boil, turn off the heat, and cover.  Let it sit just enough to hydrate everything thouroughly.  
+Spread mixture evenly between two sandwich rounds and enjoy your trail Sloppy Joe's!