dehydrated meals

Hawaiian Rice - Trail Recipe

Since NoKey and I are getting ready to tackle another thru hike in 2017 I thought I'd start sharing some recipes with my readers.  A few years ago, when we took off to do a series of smaller thru hikes, I decided to attempt home dehydrating all our meals for a few reasons. Home dehydrated meals are economical and a lot more healthy than just eating a few of the same Lipton Sides over and over again.  It keeps your tastebuds and your wallet happy!

One of our favorite recipes a few years back turned out to be Hawaiian Rice.  This also was the first meal we ever ate out on the Benton MacKaye Trail.  I wanted to eat it first because I was entirely convinced I'd hate it.  This one, however, became an instant hit!  Every time we'd see it in our resupply boxes we'd do a happy dance.  Check out my recipe for Hawaiian Rice below!

Hawaiian Rice (1 Serving)

1/2 cup home dehydrated brown rice (cooked in veggie stock)
2 tbsp home dehydrated pineapple
1 tbsp home dehydrated bell pepper (broiled and blackend before dehydrating)
1 tbsp dried onion flake
1 tbsp unsweetened flaked coconut
1/4 tsp salt
1/4 tsp powdered ginger
2 tbsp bacon bits or ham-flavored TVP
1/2 tsp ham base

At home:
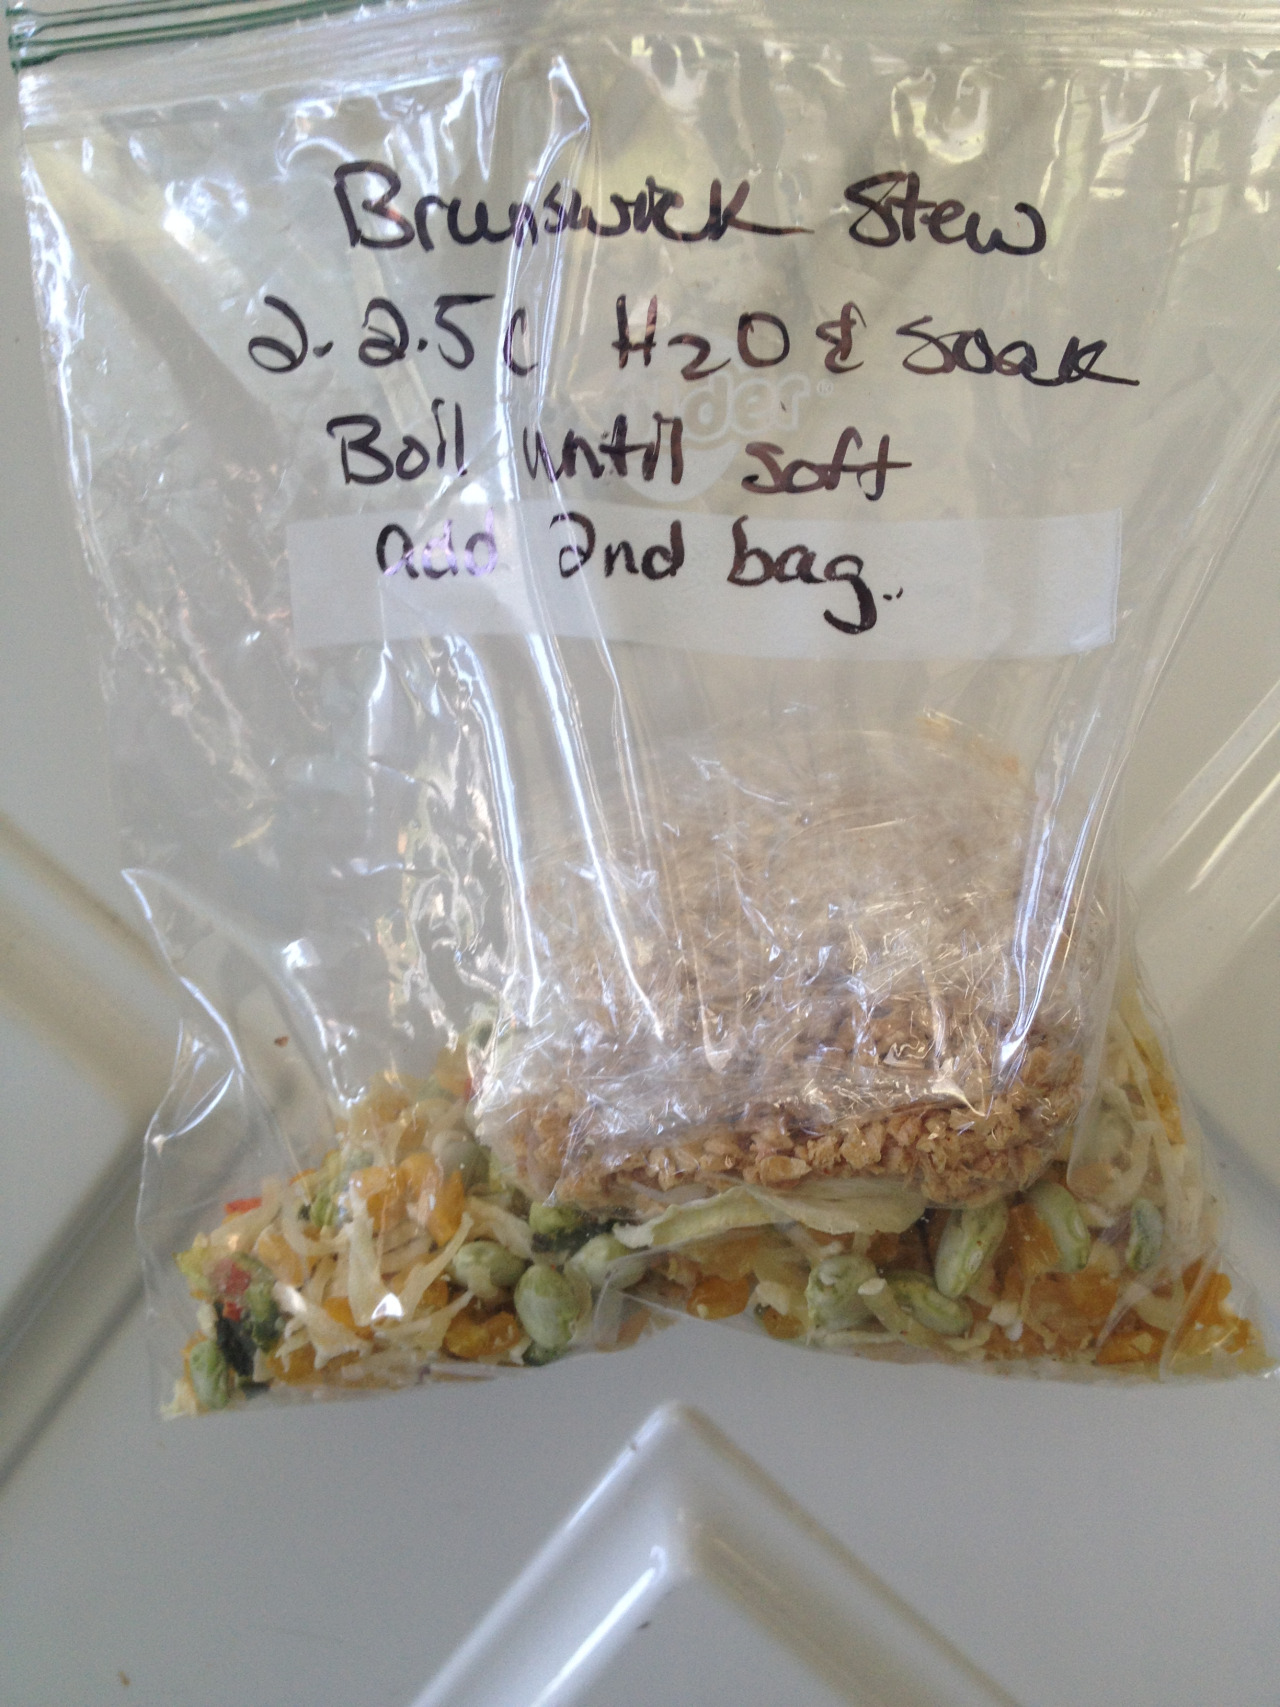
Add the rice, pineapple, bell pepper, onion flake, coconut, salt, and ginger into a sandwich size zipper bag and mix well.  Add the bacon bits/TVP and ham base to a snack size zipper bag and mix well; seal the bag.  Add the small zipper bag into the larger bag and seal shut.  

On trail: 
Separate the two bags.  Add the contents of the large bag to your cook pot and cover with water - you are just covering the ingredients here, no need to measure.  Stir and then bring to a boil.  Stir and then remove from the heat.  Add the contents of the smaller bag and stir again.  Let meal sit for 5-10 minutes until it reaches your desired thickness and consistency and enjoy!

This recipe was adapted from Chef Glenn's Hawaiian Shrimp and Rice.  I cannot recommend his website enough if you're looking to learn how to make your own backpacking meals!

Have you made your own dehydrated meals before? How did it go? 

One Summer, Two Hikers, Three Trails, and Not a Single Lipton Side in Sight!

An entire summer worth of food stretched out all over our spare bedroom!  Everything we will be consuming on our three hikes is here. 

An entire summer worth of food stretched out all over our spare bedroom!  Everything we will be consuming on our three hikes is here. 

I've finished!  A week ahead of schedule I have all of our food dehydrated, packaged, and ready to mail out to a friendly post office near the trail somewhere in the eastern portion of the US.  Thanks to a friendly hiker on Instagram I have also learned that Priority Mail Regional boxes will save me a FORTUNE!  Seriously, go to the USPS website and order your own regional boxes.  They're bigger and, for the BMT if we mail them from my parents house, we're going to save SEVEN BUCKS a box!

So, here's the breakdown of what I've made meal-wise for the summer:
Breakfasts: Sweet potato pudding, rice pudding, pizza grits, breakfast couscous, assorted Poptarts.  I also made a special breakfast drink out of Carnation Instant Breakfast, powdered coconut milk, and instant coffee.
Lunches: Refried bean burritos with salsa, dal with tortillas, sandwich thins with peanut butter/cashew butter or tuna, Poptarts
Dinners: Dal with rice, Hawaiian-style ham and pineapple rice, "soul food" with brown rice and blackeyed peas, mushroom stroganoff with egg noodles, mac & cheese, sloppy joes, Thai-style ramen. 
Snacks: Picky Bars, candy bars, trail mixes, dehydrated apple chips

We'll have enough dinners to get through the trail and we'll need to supplement still with the tuna packets and the peanut butters.  I don't have either of those meals planned for the BMT though, so the shopping for the tuna can wait until we're back in NY for the Finger Lakes Trail. I'm hoping that our portion sizes for the meals we've chosen work out alright.  The hardest part of planning all this cooking has definitely been the fact that the meal sizes all seemed to vary SO MUCH!  One recipe I made, the dal, called for serving 3 people.  I ended up getting 14 servings out of it with the measurements provided in the recipe!  I ended up with more dinners and less lunches due to these sorts of discrepancies, but hikers are great at adapting and if we end up having to cook lunches - so be it!

I had a few people ask me how expensive it was to do all these meals so here's the price breakdown:  I had budgeted approximately $400 for food and shipping and I'm happy to say that after we ship everything I will be under $400 for the entire summer.  That's for TWO people plus shipping!  For an average AT resupply, I was typically spending $25 to $30 per stop on just myself.  So, if we say that NoKey and I were spending $30 per person on our summer hikes, we'd be spending approximately $480 on food.  This, of course, assumes we'd be able to even get to a decent store on these trails!  The BMT goes through smaller towns than the AT - smaller towns which also see less hiking traffic than the AT and aren't quite resupply friendly.  Most of our options are tiny stores or convenience stores.  Those types of stores don't often carry much and are often insanely expensive.  Since I've done our food, I know we'll have the nutrition we're looking for, as well as the variety to keep us from getting sick of everything we're eating.  I know the Long Trail will have better resupply options on the southern portion so when the lunch/breakfast situations starts to look slim, we can supplement for a regular town resupply for breakfast items.  

I hope you've enjoyed seeing all the food prep I did over the past few weeks.  I'm very excited to get out and get hiking and can't wait to share the journey with you guys.  Happy Trails!

Trail Magic and Trail Food Cravings

Yesterday we made a surprise trip down to the Finger Lakes Trail to pick up our friends Buttons and Bearwalker.  They're thru hiking the North Country Trail, 4500 miles from Vermont to North Dakota, and needed a ride to the post office.  Since New York isn't exactly hitchhiker friendly, especially when people aren't used to seeing them, they only had a short amount of time to get to their resupply box, which had their dog food in it.  Since Molly  had run out of food and the post office was closing soon, we rushed down to get them, getting them to the post office at 5:05 p.m.  Even though they closed at 5, the postmistress still allowed them to pick up their package!  We got to hang out with them last night and have hiker talk, eat large amounts of food, and look at all their gear.  It was a great time with them and we dropped them back off at the trailhead today.  

When we got home I was pretty hungry and, probably due to being in full on hiker mode for the day, was craving ramen.  Yes, ramen!  The cheap staple of broke American diets and thru hiker cuisine de jour.  Since I was whipping up a ramen recipe for us to take on the trail, I figured it would be the perfect time to test out the spice blend I was planning on using on our batch.  With the fresh veggies I added from the fridge,  I had a steaming bowl of hiker supper!

Ramen with broccoli, portobello mushroom, red onion, and carrot.  

Ramen with broccoli, portobello mushroom, red onion, and carrot.  

Here's the trail recipe I developed tonight, and a photo of how nicely it all packs out to camp! (Links provided for hard-to-source ingredients!)

Thai Ramen, packed and ready to hit the trail!

Thai Ramen, packed and ready to hit the trail!

Thai Ramen - 1 serving
1 pack ramen of your choice (chili lime shrimp would be perfect!)
1/4 cup dehydrated mixed vegetables
1 tablespoon powdered coconut milk
1/2 tablespoon powdered peanut butter
1 tablespoon cashews
1 True Lime packet
1 Sriracha packet
At home prep:
+In a snack-sized zipper bag, combine the cashews, powdered peanut butter, and powdered coconut milk.
+In a regular-sized zipper bag, pour in your dehydrated vegetables, place a ramen packet inside, and add the packet of True Lime and sriracha sauce. 
+Add the snack-sized bag to the large bag and seal
In Camp:
+Remove the bag with the coconut powder, peanut butter, and cashews.  Also remove the True Lime and sriracha sauce. 
+Break up the ramen in it's pack, then open it and pour the ramen and the vegetables in your cook pot.  Remove the ramen seasoning packet and cover the noodles and vegetables with the water level you chose for your soup. 
+Cook ramen according to package directions and turn off the heat.
+Add the ramen seasoning, powdered coconut milk, peanut butter, cashews, and True Lime packets.  Add sriracha sauce to your desired level of spiciness.  For best flavor, allow the mixture to cool off and let the flavors meld together. 

More food prep!

14 servings of mushroom stroganoff and a box full of hiker condiments at my house today! 

14 servings of mushroom stroganoff and a box full of hiker condiments at my house today! 

More than 7 pounds of mushrooms are cooked down and in my dehydrator this morning.  My box from minimus.biz showed up this morning too!  I've got individual sized packets of Franks, Cholula, lime juice, sriracha, and salsa for our meals this summer. 

Trail recipe review: Vegetarian Brunswick Stew

After lots and lots of hard work, I had a batch of six dinners made up for some overnights.  Brunswick stew is traditionally a southern dish made with chicken or pulled pork, beans, okra, onions, etc.  There are many variations on the stew and I adapted my recipe from Tim and Christine Connors’ version in the book “Lipsmackin’ Vegetarian Backpackin’”. Here’s what you’ll need for my version:

-1 lb bag of baby lima beans
-1 lb bag of frozen corn of any variety
-1 lb bag of frozen hash browns (southern style or regular)
-1/2 cup of dried mixed bell peppers
-6 vegetable bullion cubes
-3/4 cup of TVP (textured vegetable protein); I tried to find a ham-flavored or a bacon-flavored, but had no luck - those flavors would be great!
-1/2 cup dried onion
-8 teaspoons of tomato powder (really crazy expensive, it’s best to make your own by dehydrating tomatoes and pulverizing them in a blender)
-1/2 cup of instant potato flakes
-Fresh black pepper to taste

Pre assembly prep work: You’ll have to dehydrate all the frozen and fresh stuff first.  The beans, corn, potatoes, bell peppers, and onions will all have different drying times as according to your dehydrator.  Be sure to consult your book for precise temperature settings and hourly times to get your stuff dry.  Also, do the onions on their own!  Otherwise, everything in the dehydrator with them will taste and smell like onion! On onion day, I highly recommend putting the dehydrator outside.  The smell is incredibly strong!  

For the tomato powder, I took five large heirloom tomatoes and sliced them thin, about 1/8 of an inch, and put them in my dehydrator for about 10 hours.  You’ll want to keep checking them to make sure they’re drying evenly.  You want them to be extremely brittle and breakable. After they’re completely dried out, put them into a blender or Magic Bullet and pulverize them.  Voila! You have tomato powder, which is extremely rich in flavor and takes up so much less space in the pantry. For  a more detailed explanation how to make it, check out this YouTube video: https://www.youtube.com/watch?v=kdb5cKnupj8

So, all your ingredients are dry and ready to be mixed! Here we go:

In a large bowl, combine the dry beans, corn, hash browns, and bell peppers and mix well.  Using a 1 cup measuring cup, divide the bowl into six freezer bags.  This will be your storage bag for the meal.  

Now, on six pieces of plastic wrap, place one bullion cube in the middle and crush it.  Now evenly divide up the dried onion, add 3 tablespoons of TVP, 2 teaspoons of tomato powder, 1 tablespoon of potato flakes, and some fresh ground pepper.  Wrap this bundle up.  Now you have your two separate bags.  Put the plastic wrap bundle into the large freezer bag.

Directions for camp cooking: 
We always presoak our food to save on fuel.  Remove the bundle of plastic wrap and set it aside.  Pour 2 cups of water into the freezer bag with the dried vegetables and let it soak, up to 30 minutes.  Dump the bag of water and semi-rehydrated veggies into your pot and bring to a boil.  After about 3-4 minutes, check your veggies for softness.  You’re looking for a good “al-dente” texture to them.  Turn the heat off, cover the pot and add the contents from your plastic wrap bundle.  Stir in well, cover, and let it set up for 3-4 minutes.  The reason the bundle is added in after turning off the heat is to prevent the contents of this bag from scorching or sticking to your pot.  Of note, I would recommend abbreviating these directions and writing them on the freezer bag, like in my photo above.  That way, you won’t be stuck remembering how to cook it in camp!

We liked this meal quite a bit.  It is vegetarian and we aren’t, but man was it filling!  The fiber from the beans and the protein from the beans and TVP kept us both full all night after hiking a 15-mile day.  The only thing we wished we had was salt.  I feel like salt would really bring this meal a little bit more together.  Clean up for this wasn’t difficult at all due to the instant potatoes, which act like a scouring agent in the pot and make it easy to wipe out with a baby wipe and rinse clean.  Hope you enjoy it!